
If you have been working with Entra ID, you’ve probably figured out that managing on-premises active directory security groups (AD groups) might be one of the biggest “how to?” questions when planning to use this cloud-based identity solution. As you might know, AD groups can only be managed from your domain controllers (or servers with RSAT installed), which creates a disconnect between modern cloud governance and traditional on-premises management.
From my point of view, there are two ways to handle AD groups memberships using Entra ID Governance. The first approach uses the built-in feature: Group write back. This essentially enables you to create an Entra ID Security group and then sync the group and its members to your on-premises Active Directory to be used however you need. The drawback is that you need to recreate your security groups in Entra ID, sync them back, and then replace groups wherever they’re used – which can be quite a hassle in complex environments.
The second way, which I’ll focus on in this blog post, leverages a combination of PowerShell and JSON along with Entra ID Governance entitlement management Access Packages. This approach provides more flexibility while being easier to maintain and understand for anyone who might need to work with it in the future.
In this blog post, I’ll demonstrate how to manage AD group members by using Access Packages in Entra ID governance entitlement management.
Pre-requisites:
- Azure virtual machine with RSAT installed
- Azure automation account setup with hybrid worker with the VM that has RSAT installed.
- Service Account with Active Directory Group write permissions.
- Service Principal with User.Read.All & EntitlementManagement.Read.All
- Identity Governance Administrator.
The JSON Configuration File
Let’s start by constructing the JSON file that will map access packages to AD groups. I like using JSON for this solution because it separates the configuration from the code, making it much easier to update and maintain over time.
The structure is straightforward – each object in the JSON file contains:
- The Access Package ID (Object ID of the Access package, which can be found by navigating to the Access Packages overview tab)
- An array of AD Groups that should be associated with that Access Package
Here’s what the JSON file structure looks like:
With this configuration, when a user is assigned the Access Package with ID “12345678-1234-1234-1234-1234567890ab”, they’ll automatically be added to Group_A, Group_B, and Group_C. Similarly, if their Access Package assignment is removed, they’ll be removed from these groups.
The beauty of this approach is that you can easily update the JSON file to add or remove groups without having to modify the PowerShell code. This makes maintenance simpler and reduces the risk of introducing bugs when making changes to your group assignments.
The PowerShell code
This PowerShell script is the engine behind the solution. It starts by retrieving the user’s current Access Package assignments from Entra ID Governance, then gets their current AD group memberships. Once it has both sets of information, the script compares these with the mappings we defined in our JSON configuration file. Based on this comparison, it intelligently adds or removes the user from AD groups as needed. It’s important to note that the PowerShell script will remove a user from an AD group if the AD group is associated with an Access Package in the JSON file
Before you can use this script, you’ll need several key components. You’ll need the username and password of an AD Service account with group write permissions to make the actual changes in Active Directory groups. You’ll also need the Object ID of the Access Packages Catalogs that contain your Access Packages. Additionally, you’ll need the path to the JSON file we created earlier and a Service Principal with Microsoft Graph the following permissions: User.Read.All & EntitlementManagement.Read.All (application)
The script below loads the JSON file from a local path. If you prefer to load it directly from GitHub (which I recommend for easier maintenance), check out my other blog post: Import SQL query from GitHub repository into a PowerShell script and adapt the approach for JSON. Using GitHub makes your configuration more maintainable and allows for version control of your mappings.
Link to PowerShell script that loads the JSON from GitHub: Entra/Governance/Entitlement Management/Manage AD Groups/GitHubJSON-AddRemoveUserFromADgroups.ps1
When the PowerShell script has been changed to fit your needs, you then need to upload the PowerShell script to your Azure Automation account (Where the hybrid worker is installed)
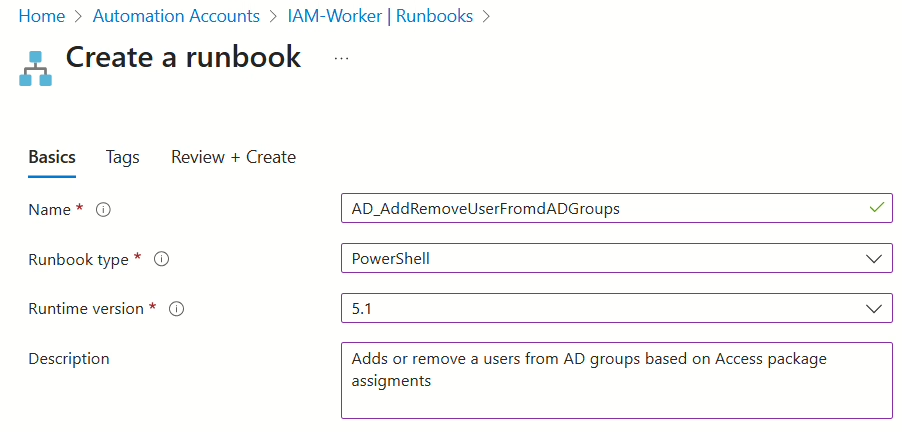
When the Runbook has been created with PowerShell script, we can then move on to create the Custom Extension.
Creating Custom Extensions in Entitlement Management
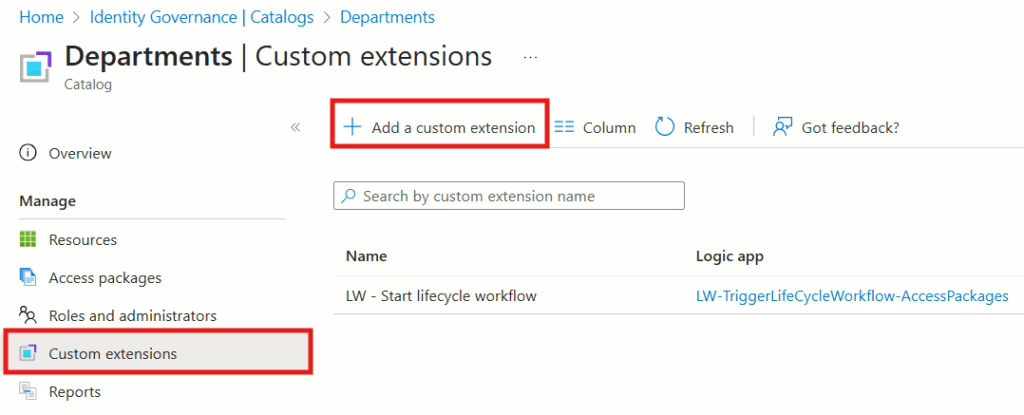
You will need to create a Custom extension in each catalog where you want to use this solution. For example, if you have a catalog called “Departments” and another called “Locations,” you will need to create two Custom extensions—one in each catalog.
Start by navigating to the catalog containing the Access Package that needs to have an AD group associated with it. Then, click on Custom extensions, followed by Add Custom extension.
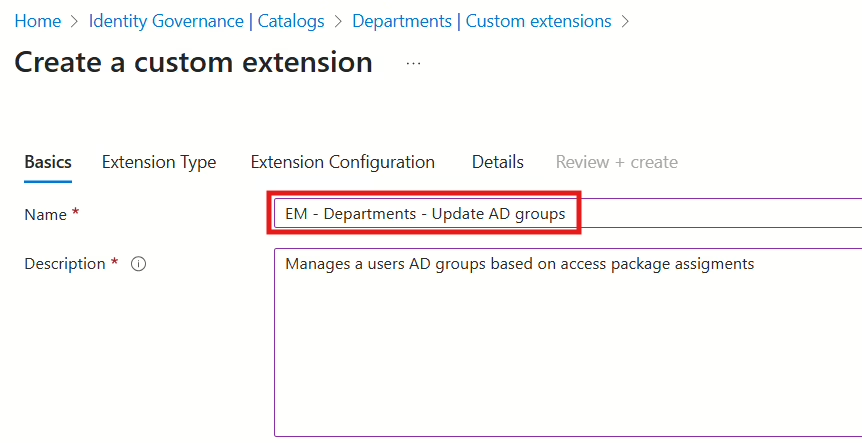
Give your new custom extension a name. I recommend naming it after the Catalog it’s created in—for example: EM – Departments – Update AD groups.
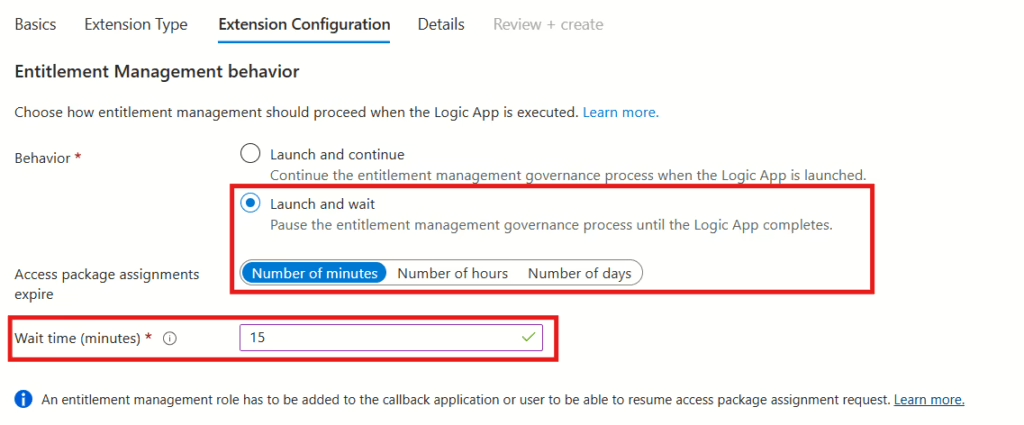
Set the launch configuration to Launch and wait, and then set the number of minutes you want. I’m going with 15 minutes.
Then select the resource group where the Logic App (Custom extension) should be created, and give it a name. I’d recommend using the same name as in the first step.

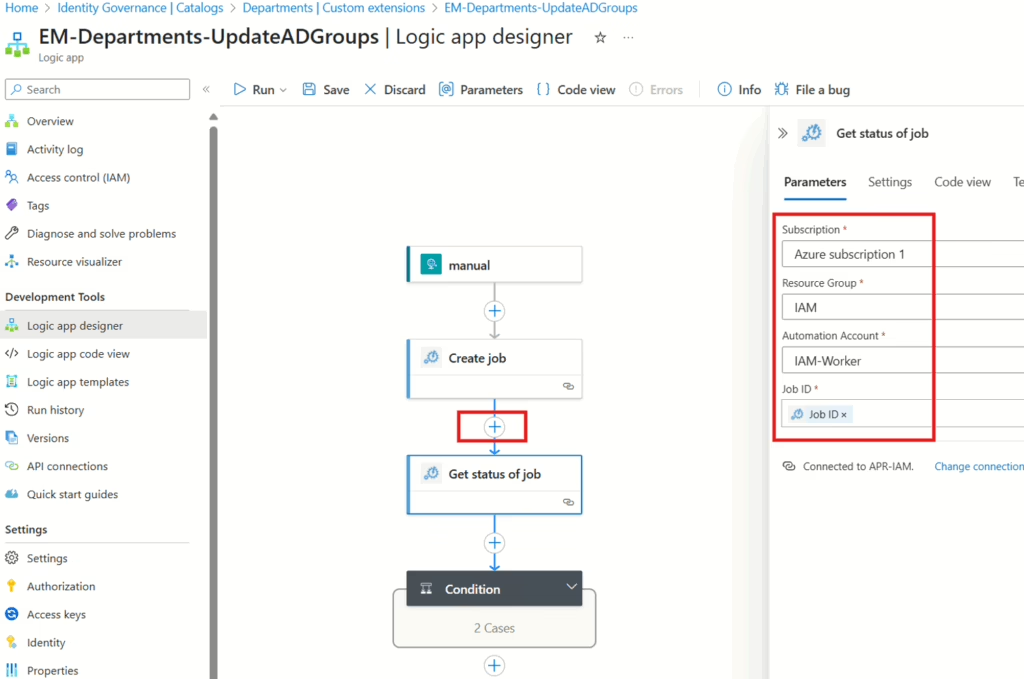
Once the Logic App has been created, head over to the Designer pane and add a new step between Manual and Condition. The step you’re looking for is Create a Job from Azure Automation. Fill it in with the details of your Automation Account that’s set up with the Hybrid Worker.

Once the first step is configured like in the screenshot above, go ahead and add another step to check the status of the Automation Job — like this:
When you’re done, click Save at the top.
This process needs to be repeated for each catalog where you have Access Packages that should trigger this PowerShell script.
Wrapping up
With this approach, you can easily automate and streamline the management of on-prem AD group memberships using Entra ID Governance and Azure Automation. By leveraging PowerShell and a simple JSON configuration, the solution provides flexibility while being easy to maintain. Whether you’re managing a few groups or dealing with a more complex setup, this solution can save you time and reduce manual errors.
Remember, the key here is the separation of configuration from the code, which allows you to modify group assignments without touching the script itself. This makes ongoing updates more manageable and less risky in the long run.
Tip: You can also create a Custom Extension to run this with Lifecycle workflows