
When I started using Microsoft Entra ID Governance Lifecycle workflows to handle Joiners in my company, the first task I wanted to accomplish using the Lifecycle workflows was the creating of a new employee’s mailbox in a hybrid environment. Creating of user mailboxes is not an out-of-of-the-box task in Lifecycle Workflows, but it can be done by using PowerShell and then having the Pre-onboarding Lifecycle Workflow template run the task of creating the mailbox with PowerShell for the new user.
The task of creating a mailbox for new user is something that I think most people will be thinking about on how to accomplish, when they are thinking about moving to use Microsoft Entra ID Governance to handle Joiners, especially when you are in a hybrid environment.
In this blog post I want to share with you how I’m creating a mailbox for a new employee using PowerShell and the Onboard pre-hire employee Lifecycle workflow template in Microsoft Entra ID Governance.
Pre-requisites
This blog post relies heavily on this blog post: How to run PowerShell scripts in Entra ID Governance Lifecycle Workflows. All the resources and configuration that are needed to run the PowerShell script, that creates the mailbox for new users are covered in that blog post.
In this blog post there will be a lot of direct and indirect references to it, so make sure you are familiar with the process on how to run the PowerShell scripts in Lifecycle workflows.
Creating the mailbox for a new employee
In a hybrid environment where the user is created in Active Directory (preferably by using the Microsoft API-driven user provisioning) and then synchronized to Entra ID, the mailbox must be created in Exchange on-premises and then migrated to Exchange Online. This means that if we want to use a Lifecycle Workflow to create the mailbox with PowerShell, we need to run the PowerShell script that creates the mailbox on a Hybrid worker that is domain joined. So, the first thing we need to make sure is that the Azure Virtual Machine (VM) that functions as the Hybrid Worker can connect to the Exchange On-premises server(s). You can test it by running this PowerShell script on your Hybrid Worker VM.
Remember not to hardcode credentials in production!
The output should then return a list of mailboxes on your Exchange on-premises environment. If succesfull you can move on. There shouldn’t be anything you need to configure prior to this, but it can variate from environment to environment.
To create a user mailbox in an Exchange on-premises using PowerShell in a hybrid environment using, my preferred method is to use the following command: Enable-RemoteMailbox
From the Microsoft docs:
The Enable-RemoteMailbox cmdlet mail-enables an existing on-premises user. The mail-enabled user contains a specific attribute that indicates that an associated mailbox in the service should be created when the user is synchronized to the service using directory synchronization. Link
This is the full PowerShell script that I’m using to create a mailbox using the Onboard pre-hire employee Lifecycle workflow template in Microsoft Entra ID Governance:
You need to make a few modifications to the PowerShell script – You need to provide it with Exchange On-premises credentials that has the permission to run Enable-Remote mailbox on a user. For inspiration you can read this blog post about Securely storing and retrieving credentials with Azure Key Vault in PowerShell scripts, instead of hardcoding credentials into the code.
The DisplayName and Alias for the user mailbox is provided by the Lifecycle workflow in the Logic app, you will “connect” theese two PowerShell parameters in the Logic App later on. The alias is the same as the UserPrincipal name of the user, but without @domain.dk. So, if the UserPrincipal name is cfp@christianfrohn.dk, then the alias will be cfp.
The last thing you need to provide is the Primary SMTP address and the Remote routing address for the user mailbox. If you are not sure how to find these. You can run the following command to get it from an existing user in your environment that has a mailbox.
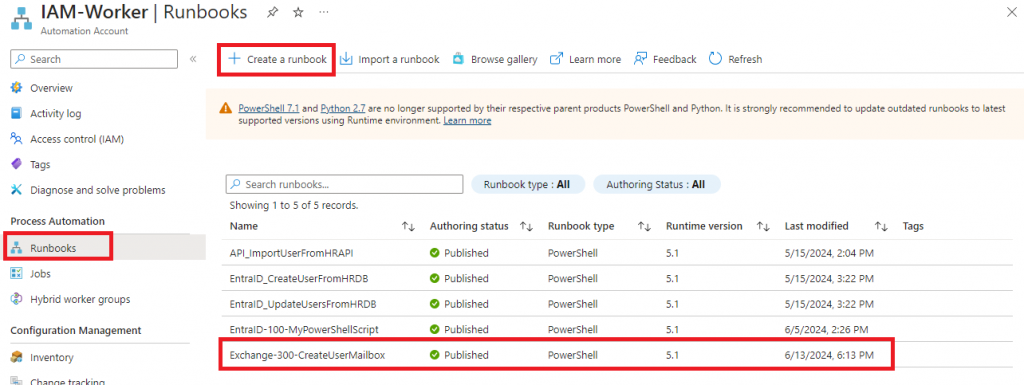
When the PowerShell script has been modified to fit your needs, create a Runbook in your Automation account where the Hybrid worker VM is installed and then add the PowerShell script into your Runbook.
The last thing that needs to be done is to configure a Custom extension in Lifecyle workflows in Entra ID Governance. This blog post – as mentioned in the beginning – while guide you through that part: How to run PowerShell scripts in Entra ID Governance Lifecycle Workflows
When the Custom Extension has been created, and you have added the Automation Account Create job task. We then need to modify that task to handle Two inputs. These two input are the DisplayName of the user and they UserPrinicipalName. These two inputs are used in PowerShell script to set Displayname and alias of the user’s mailbox.
The Logic App Automation Account Create job task will then look like this:
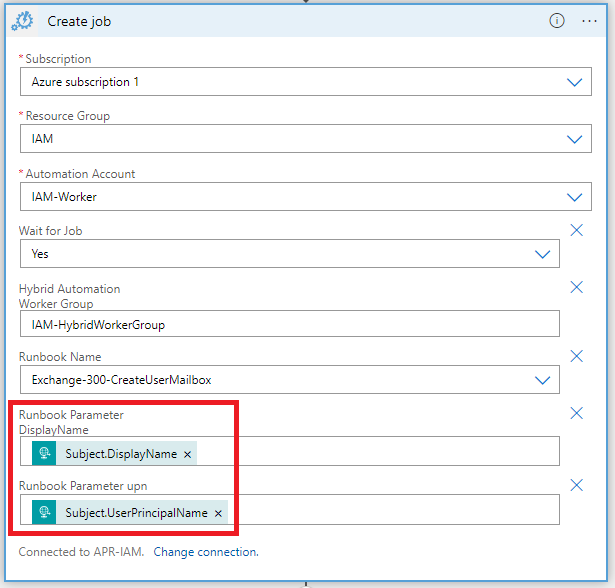
This is the only “change” you need to make to the logic app’s tasks is in the screenshot above. The rest is the same as described in the pre-requisite blog post about to how to run PowerShell scripts in Lifecycle workflows. When you have edited the Logic App, then save it.
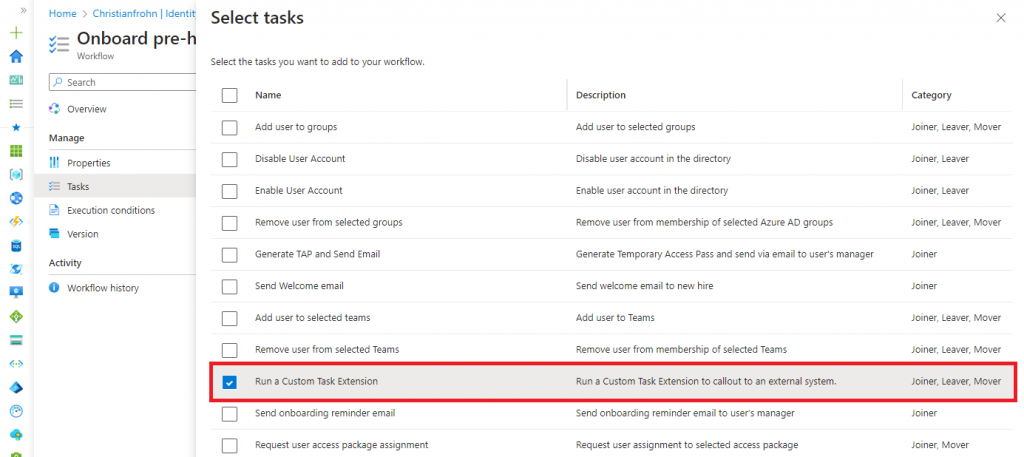
The last step is now to add the Custom extension task that creates the user’s mailbox to the Onboard pre-hire employee Lifecycle workflow template. Navigate to the Lifecycle Workflow and then select Add task, and then select Run a Custom Task Extension and add it.
Then select it from the list of tasks and provide a name for the task – Create user mailbox for example, and then select the Custom extension you created.
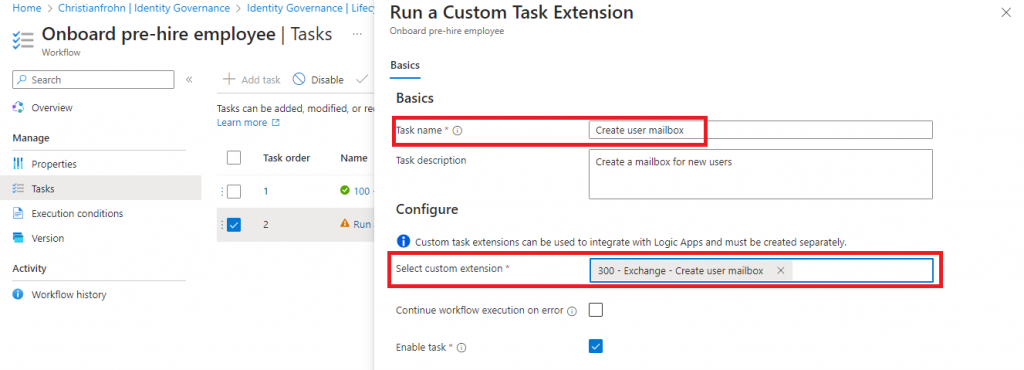
When you are done, select save and save again.
You have now configured a Lifecycle Workflow that creates a mailbox for a new user using PowerShell.
Im in the process of adding all my Lifecycle Workflow PowerShell script to GitHub – First one from this blog post can be found here: Entra-ID/Governance/LifecycleWorkflows at main · ChrFrohn/Entra-ID