
Onboarding of users is something that should not be taken lightly as it’s a first impressions matter as lot and it says a great deal about an IT department for new users when the start that they have everything need to get started for the job they were hired to do. There are of course many things you need to do when onboarding users. The first step is to create a user account for the new employee. This can be done using various ways. My personal favorite is the API-driven user provisioning for Active directory. It handles the job of creating users very well – You can read more about it here:
Getting started with API-driven Inbound User Provisioning to On-Premises AD
Modifying the attribute mapping in API-driven provisioning to on-premises Active Directory
Using API-driven user provisioning with an Azure SQL database as a source of truth
But once the user is created, you need to make sure they have the right access to the resources they need. For example, they might need a Microsoft license, so they at least have a mailbox, you may need to send the manager of the employee to remind them of the employee is starting soon if the HR department is not doing that, they need access to Teams relevant for their jobs or security groups that provides access to applications. The point is that there are many tasks that need to be done before, on the day, and after a new employee has his/hers first day in your company.
With Microsoft Entra ID Governance Lifecycle Workflows, you can automate almost every task related to the onboarding of new employees from the IT department side.
In this blog post I’m going to share with you how to set up an onboarding lifecycle so you can build your own Lifecycle Workflows to handle user onboarding.
Pre-requisite
You need to the following before you begin:
- Microsoft Entra ID governance license for the users you want to manage with Microsoft Entra ID Governance.
- Global admin rights (Highest) or Identity Governance Administrator (least) for you self
- EmployeeHireDate (and EmployeeLeaveDate) attribute configured – Configure EmployeeHireDate and EmployeeLeaveDateTime in Active Directory to be used with Microsoft Entra ID Governance
Building onboarding Lifecycle Workflows
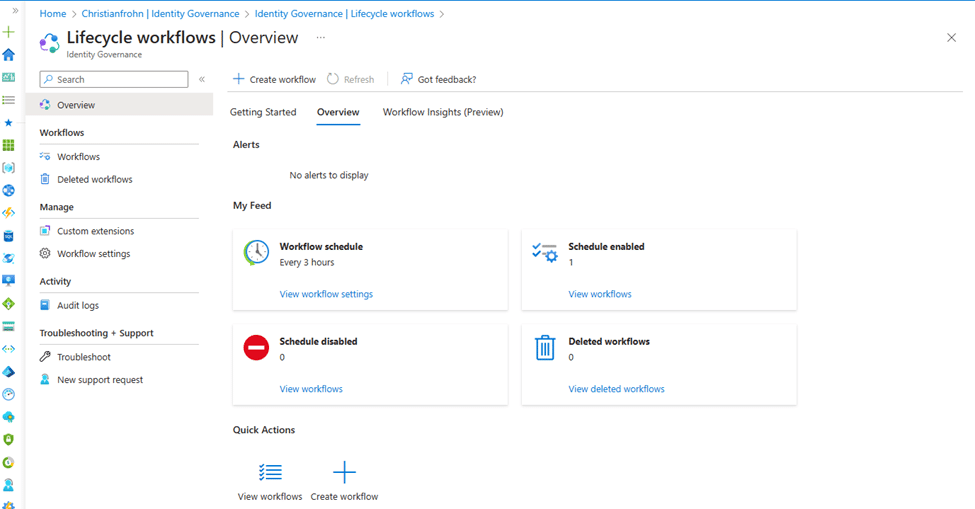
The reason you need to configure EmployeeHireDate first and foremost is because Entra ID governance Lifecycle Workflows run automatically in intervals and uses that attribute to determine if a user should be processed by a given onboarding workflow. There is the opportunity to filter out users based on other attributes, but you need EmployeeHireDate to be set up for the Onboarding Lifecycle Workflows to work. We are going to start by navigating to the Microsoft Entra ID governance Lifecyle Workflows menu in the Entra Portal here: https://portal.azure.com/#view/Microsoft_AAD_LifecycleManagement/CommonMenuBlade/~/overview
The Lifecycle Workflow we are going to set up is the Pre-onboarding workflow. Click on Create workflow select: Onboard pre-hire employee
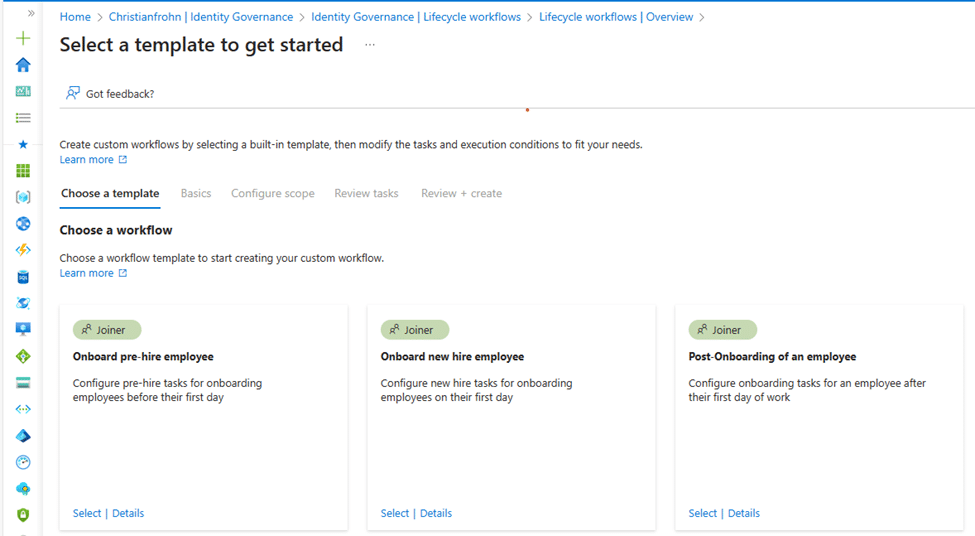
We going to start with this because this the workflow that will run X number of days before the employees first day (EmployeeHireDate), and we want to make sure that various task has been done before the first day – The tasks I’m talking about is the following:
- Add user to selected groups.
- Add user to selected Teams.
These two simple tasks to set up the days before and employees first day, by doing it a couple of days before they start, we will ensure that we don’t need to wait for various systems to sync up (also known as waiting a “cloud minute). So, to configure the two tasks, select we first need to define when the lifecycle flow should run. I’ll recommend 21 days because that should be enough time to systems to sync up – But the choice is yours to make.

The next thing we need to configure is the scope. The scope is where you have the opportunity to “filter” what employees should be processed by this workflow. Should it be all employees in a specific department or location? Or the whole company? You have many ways to define a scope. I recommend creating one for the whole company and selecting the groups that all users be a part of. The reason for this is the aim to try and keep it simple and perhaps use Mover flows or Access packages to handle department, location, or employee specific tasks – I found it easier that way, but that’s a blog post for another time.
Now this is where the more fun stuff begins. In the task you can select what you want to happen on the users that are in the scope of this workflow. Select Add task.

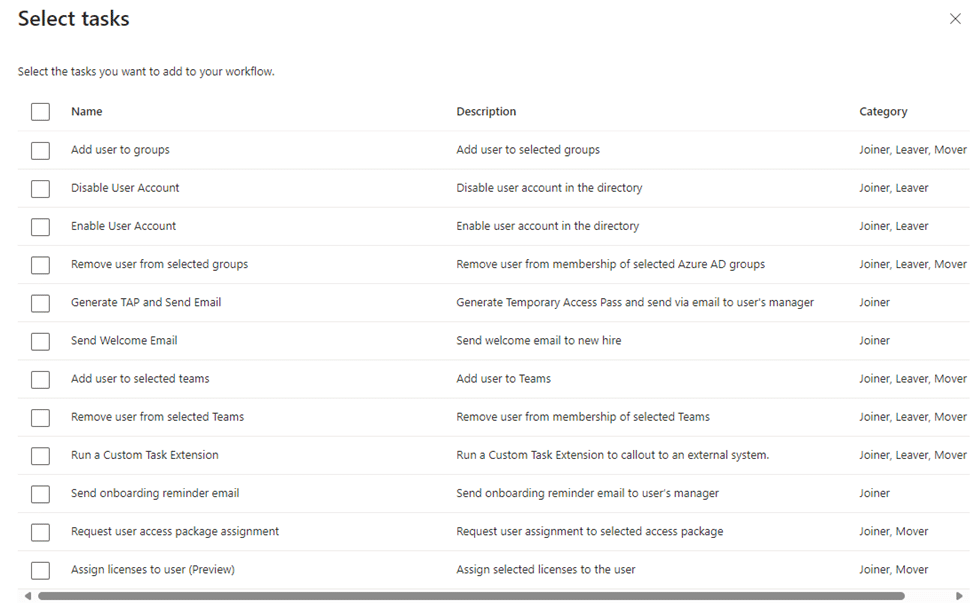
We are now able to choose which tasks we want to do in this flow. The First task is Add user to groups. Select it, and then press add. And then repeat for add user to selected Teams.
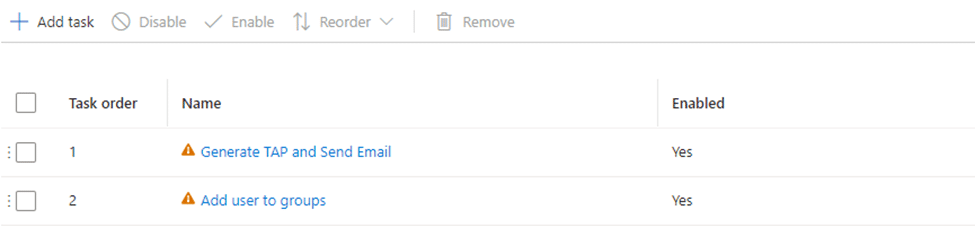
Note that there is a warning beside the tasks, that is because we need to do something before, we can save the workflow and the task(s) can run. Click on add user to groups.
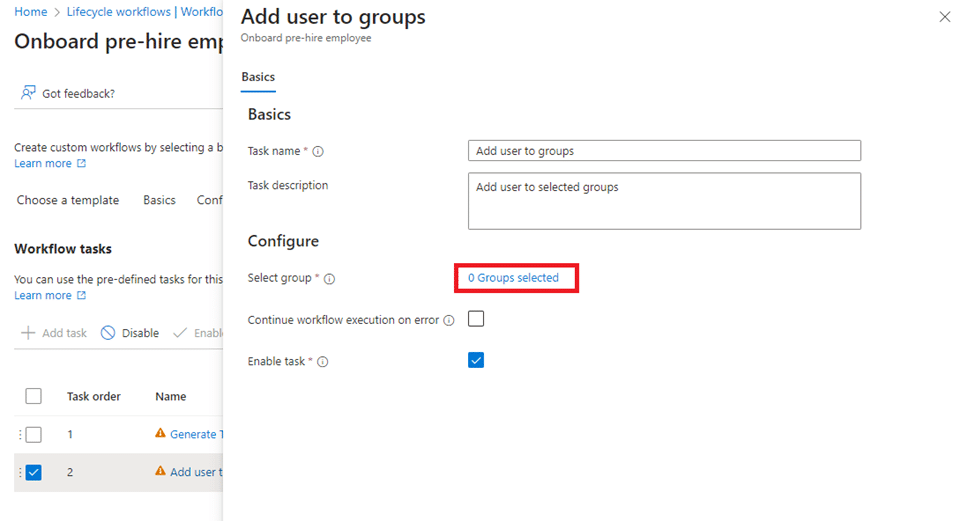
Select the groups you want the users to be added to X days before EmployeeHireDate, and then click save, and then repeat that for Selected Teams.
You can remove the “Generate TAP and Send Email” without issues.

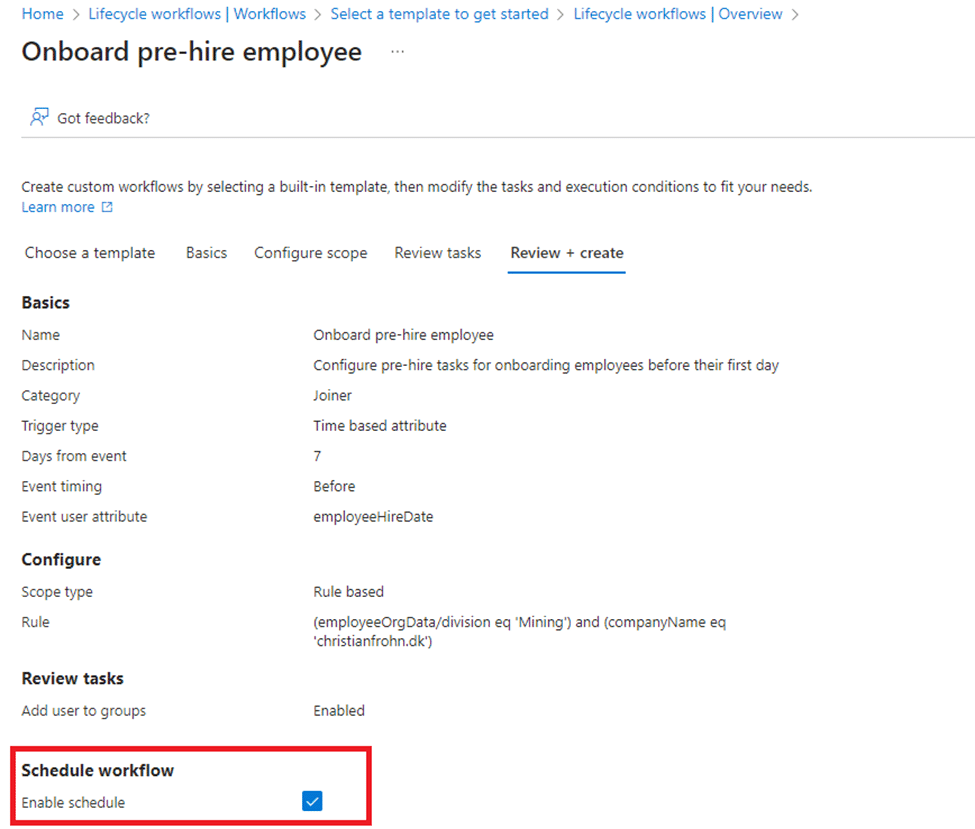
Now press Next: Review + create to complete the setup of the pre-onboarding workflow.
Remember to select Enable schedule so that the task starts to run automatically.
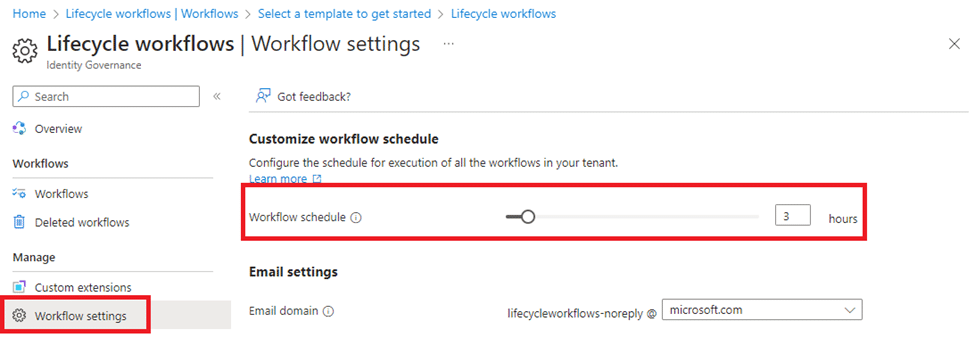
Pr. default the workflows run every 3 hours and process users in your flows. You can change that to run more frequently or less frequently in the Workflow settings:
Now that we have configured the first flow in our onboarding automation, the procedure of using the two other onboarding lifecycle flow templates is the same, with the only difference being when they run and process user. It should be noted that the onboarding Lifecycle Workflows are templates, so you can modify almost everything except for trigger – Before, on or after EmployeeHireDate.
Oh.. One more thing…
I want to leave you with something more even though onboarding Lifecycle Workflow that where configured “only” adds a new user to default company groups there is a lot more power to be fund in using them. Especially Run a Custom Task Extension:
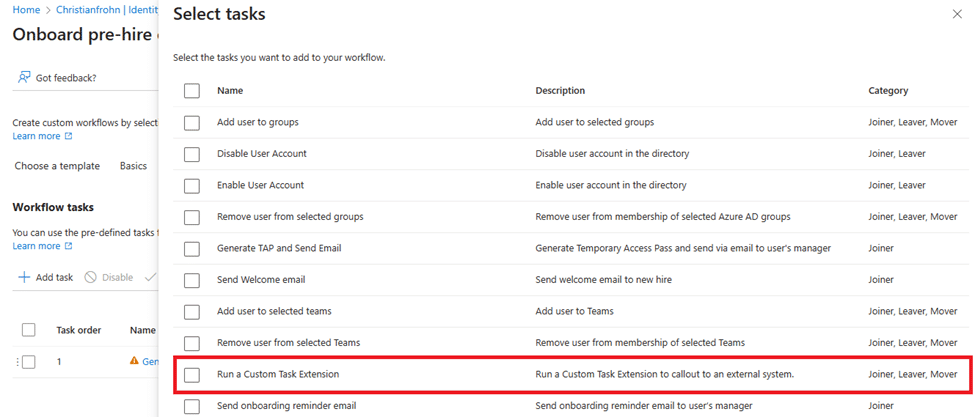
This is a feature that might be easy to overlook in the list of tasks available to you, but this is one that will enable you to do almost any task you can think of. Custom Task Extension is based on an Azure Logic App, and with an Azure logic app you configure tasks (or flows) like you would in Power Automate flows or you can make a Logic app run a PowerShell script, really the only limit so far is your imagination.
In the future I want to share with you how to create Custom Task Extensions and use it to run PowerShell tasks related to onboarding. I will provide links to them in this blog post when they are published, stay tuned.