
This blog post is a small continuation of the blog post about Getting started with API-driven Inbound User Provisioning to On-Premises AD, but in this blog, I’m going to show you how to modify the API and Active Directory mapping of attributes when you are provisioning users. This is useful if want to customize mapping of values in the provisioning of users to fit your business needs. This can be important because not all organizations use the same attributes in same way or populates the value with the same type of data.
I want to provide you with four samples of modification to the API-driven provisioning to on-premises Active Directory mapping that you can use in the JSON payload when you are provisioning users.
- How to change existing mapping to a new Active Directory attribute.
- Change UserPrincipalName mapping to use custom domain instead of default domain.
- Mapping extension attributes
- Mapping the Manager attribute.
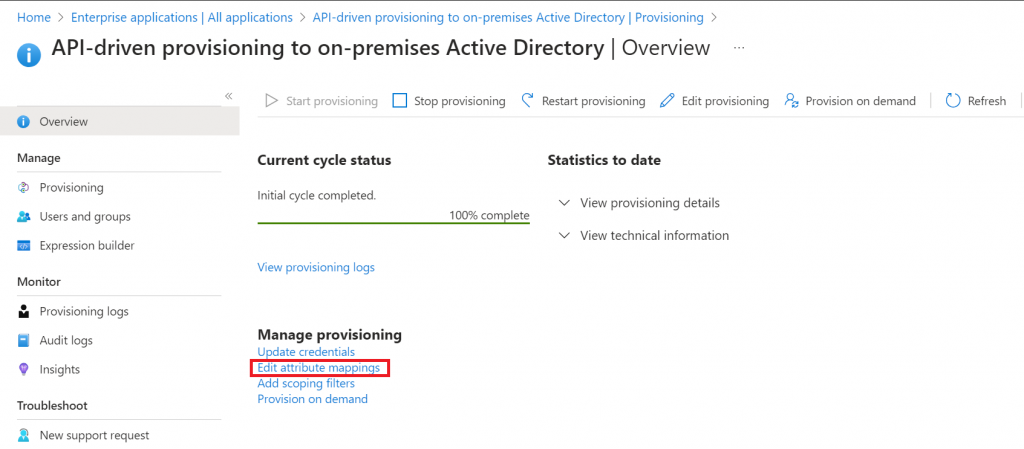
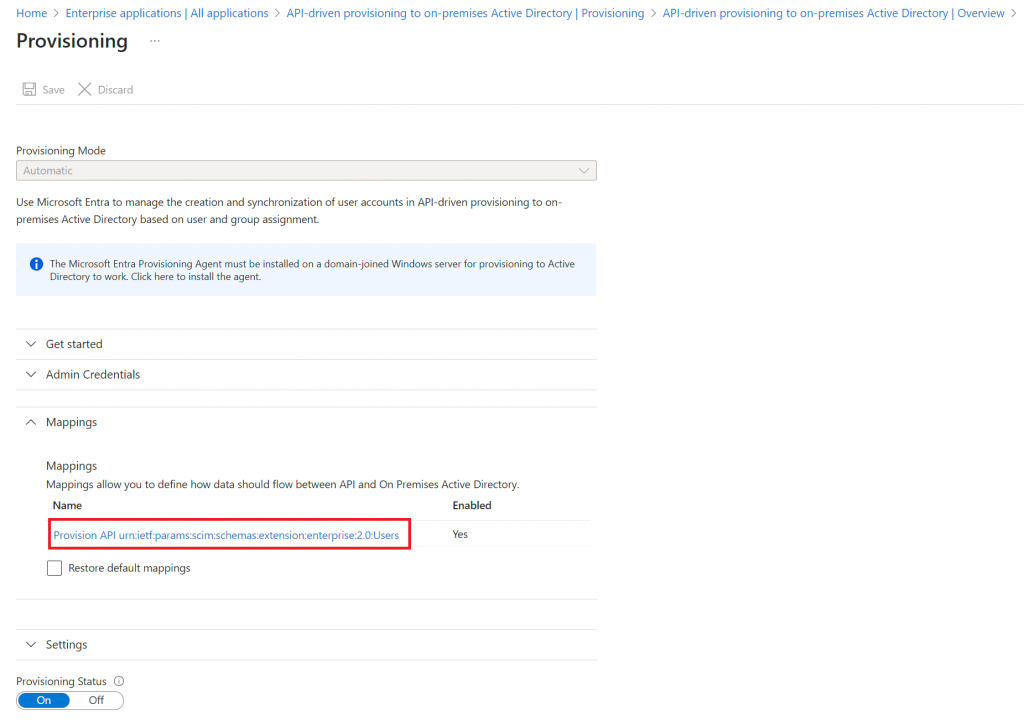
The first step to change any mapping in the API-driven provisioning to on-premises Active Directory is by navigating to your API-driven provisioning to on-premises Active enterprise application in Microsoft Entra ID and then select Provisioning in the left side of the menu and select Edit attribute mappings and then select mappings finally click on Provision API urn:ietf:params:scim:schemas:extension:enterprise:2.0:Users
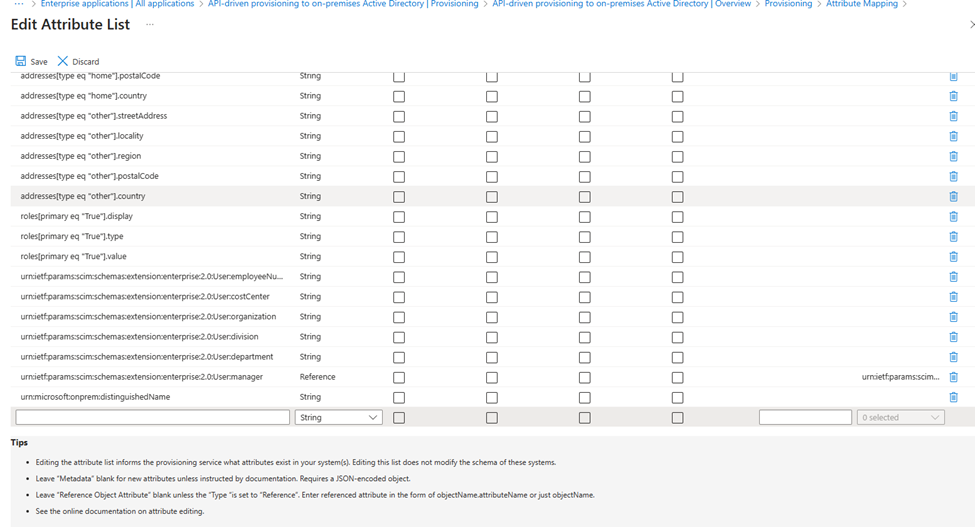
You should now see a complete list of attributes that has been mapped:
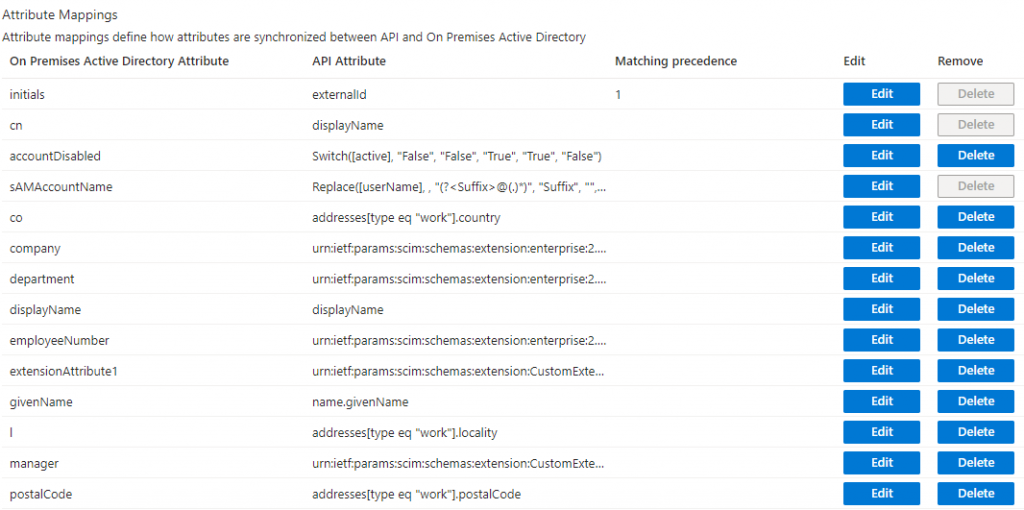
In the left side of the list, you will see the Active Directory attributes that are mapped to the API. These names should be familiar to you if you have been working with Active Directory attributes.
In the middle of the list you will see the API Attributes, these are attributes and not values. The API Attributes represent SCIM attribute names in JSON payload when you are provisioning user(s). The value of the API attribute is something that you define in your JSON payload. That also means that everything that we change here must be transferred to the JSON payload you are using. I’ll post JSON samples in this blog post further down below.
How to change existing mapping to a new Active Directory attribute.
I’ll start by showing you how to change the attribute mappings of one of the existing mappings to use a differeret Target attribute. In this sample i want to change externalid to use Initials as a target attribute instead of EmployeeID.

Start by selecting edit and then the window should look like this:
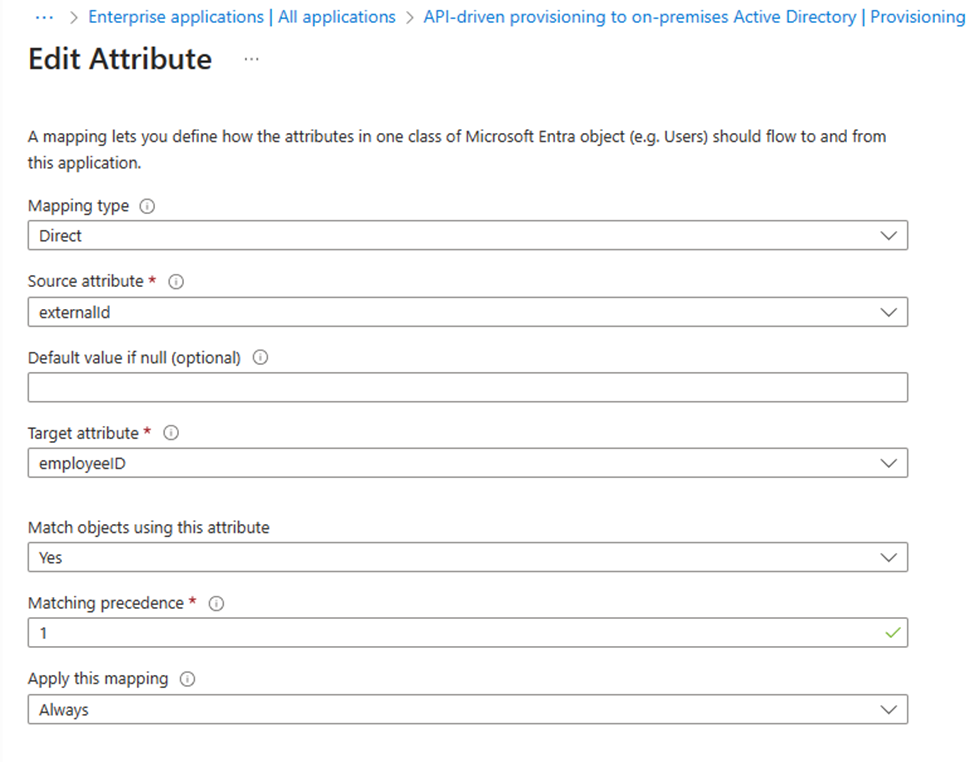
before i go any further, I want to quickly go over the basics of what you see in the Edit Attribute window.
Mapping type – indicates how the target value is calculated. Direct mappings use a source value as is. Constant mappings always use a specified value. Expression mappings allow for transformations from attributes in the source object.
Source attribute – Attribute that will be read from the source object. If a value is returned, it will be written to the target attribute.
Default value if null (optional) – If the source attribute contains no value, then write the value specified here instead. This can optionally be left blank to indicate no value should be written to the target attribute if one doesn’t exist in the source attribute.
Target attribute – Attribute which will receive the mapped value.
Match objects using this attribute – Whether this mapping should be used to uniquely identify users between the source and target systems.
Matching precedence – Matching rules define how we match source objects with target objects. We will try to find the object in the target using the rule with priority 1, if not found we’ll use the rule with priority 2, and so on
Apply this mapping – Optionally, select conditions for when this mapping should be applied (On creating or Always – This means if it’s a new user, then the attribute will be set with a value, otherwise not. If always, then every time a user is create or update then attribute value will be set)
What you just read above is from the Microsoft documentation, it didn’t want to plagiarize it, that I think it explain the what the boxes functionally is quite well. With this out of the way, let’s get to it.
As mentioned, I want to change from EmployeeID(Target attribute) to use Initials instead, then all I have to do is select Initials in the drop-down menu that says Target attribute, and the press ok in bottom of window.

What will happen now is whenever a user is about to be provisioned (Create or updated), the API will use the value of externalId in the JSON payload and then map it to the Initials attribute in Active Directory instead of employeeID. The twist for the change is that it will also be used as the first Matching precedence since we didn’t change the Match objects using this attribute box to no.
With this change, there is no need to edit your JSON payload. Because we only changed what Active Directory attribute the value should be placed in. But the employeeID attribute will no longer be populated in Active Directory with the value from externalId, that value will now be applied to Initials instead.
Change UserPrincipalName mapping to use custom domain instead of default domain.
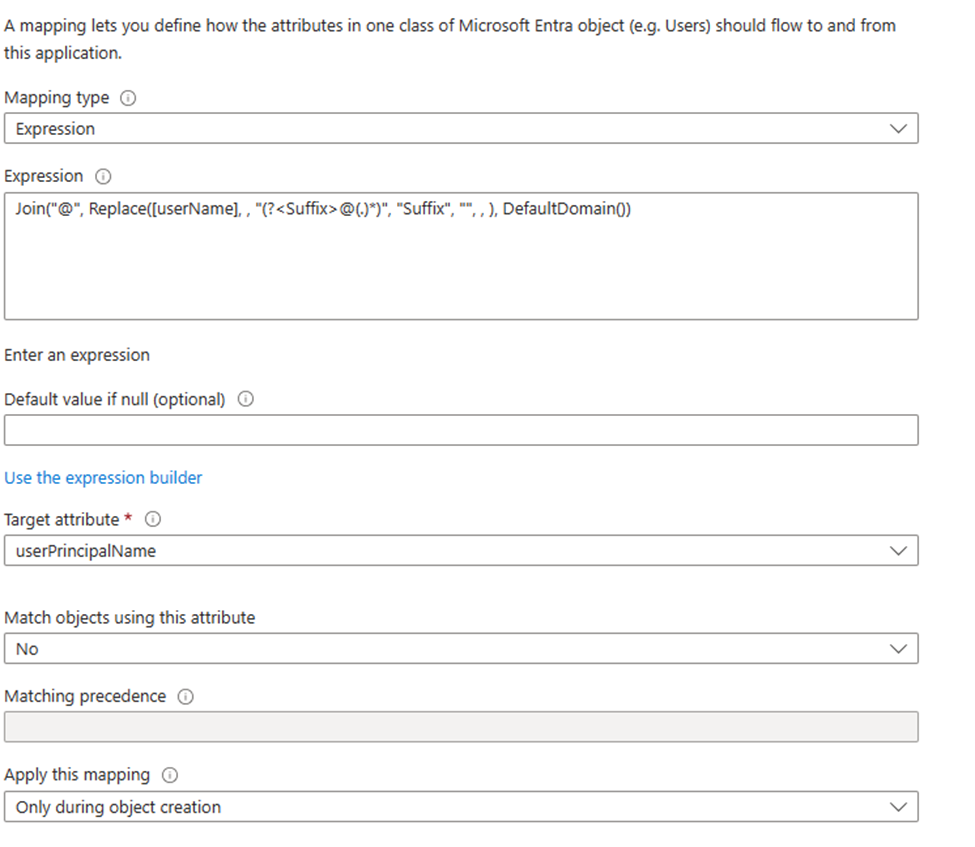
The next thing I want to change is the userPrincipalName mapping (you will find it at the bottom of the list of mappings) it should pr. default look like this:

This an attribute mapping that I needed to change in my own production environment since value of the userPrincipalName will be username@cfplab.local and my goal was to have userPrincipalName look like this: username@christianfrohn.dk instead, and I also wanted to make sure that all characters where low case, just in case use name or domain name had any uppercase characters. This is a great way to ensure consistency across your environment.
Since the following is an Expression, there is no source attribute like before with ExternalId where we can just select from a drop-down menu. (This can however be changed by changing the mapping type, but I won’t be doing that). The syntax for an Expression is similar to VBA functions – You can read more about here: https://learn.microsoft.com/en-us/entra/identity/app-provisioning/functions-for-customizing-application-data The expression in this case combines the userName attribute with DefaultDomain() after removing any domain suffix from userName. It uses a regular expression to identify and strip the domain suffix, then appends the default domain to the username.
The goal is now to change DefaultDomain() to Christianfrohn.dk instead.
Note that this is a value that only will be applied to user that are being created, since the last box Apply this mapping is set to only during object creation. So existing users won’t be affected by this.
To change the Expression to specific domain name instead of DefaultDomain value the expression can be changed like this:
Join("@", Replace([userName], , "(?<Suffix>@(.)*)", "Suffix", "", , ), "christianfrohn.dk")but since I also wanted to make sure it all to be lower case, then I could add ToLower so the Expression will look like this:
ToLower(Join("@", Replace([userName], , "(?<Suffix>@(.)*)", "Suffix", "", , ), "christianfrohn.dk"), )So, the next thing I now must do, is to replace the existing text in Expression box to one of expressions above and then select “Ok” in bottom of the window.
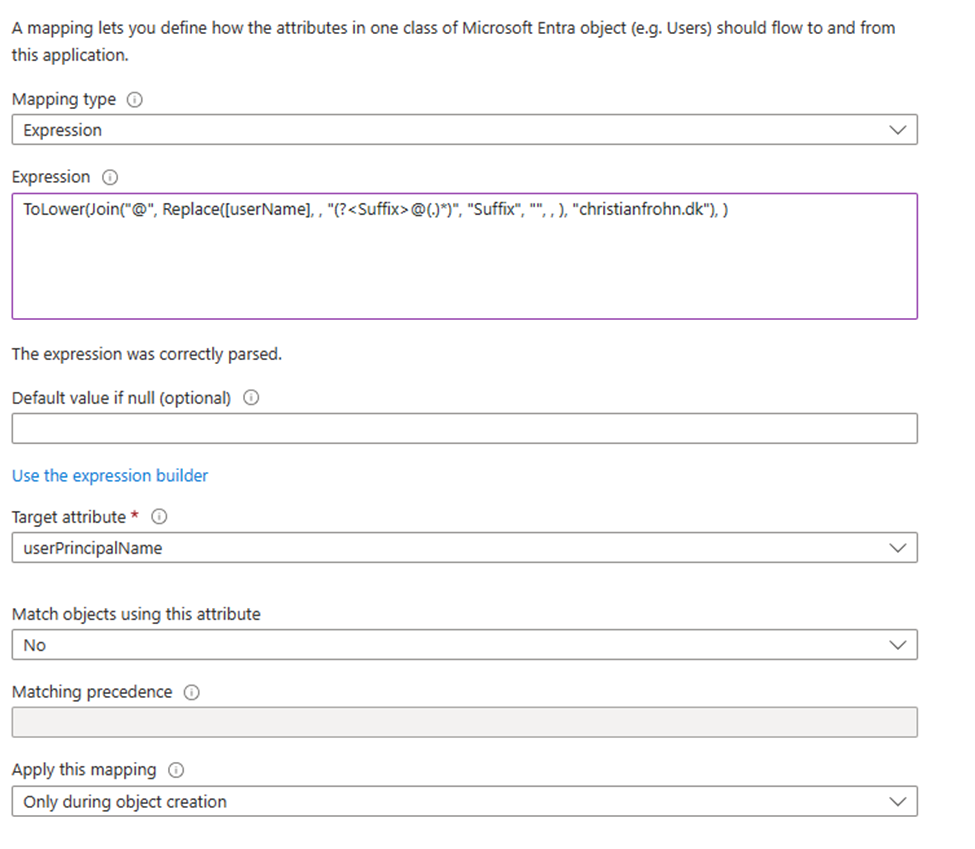
With this change there is no need to change anything in your JSON payload since this mapping has only been modified to use a specific domain name instead of the DefaultDomain() value.
The UserName value in the Expression is based on the value of UserName in the JSON payload. It’s not a defined attribute in mapping list.
It’s important to note that if you want to change userPrincipalName you should also change the mapping of the attribute called mail since they share the same logic out of the box. In my production environment I have deleted the mail mapping since the value to the mail attribute will be set during mailbox creation.

Mapping extension attributes
I now want to show you how to add your own mapping to fit your own business needs.
One mapping I was missing out-of-the-box from the installation was a mapping to ExtensionAttributes.
So, I want to show you how to add a mapping to extensionattribute1 in Active Director from the API.
Start by scrolling down to bottom of Attribute mapping list and active Show advanced options.
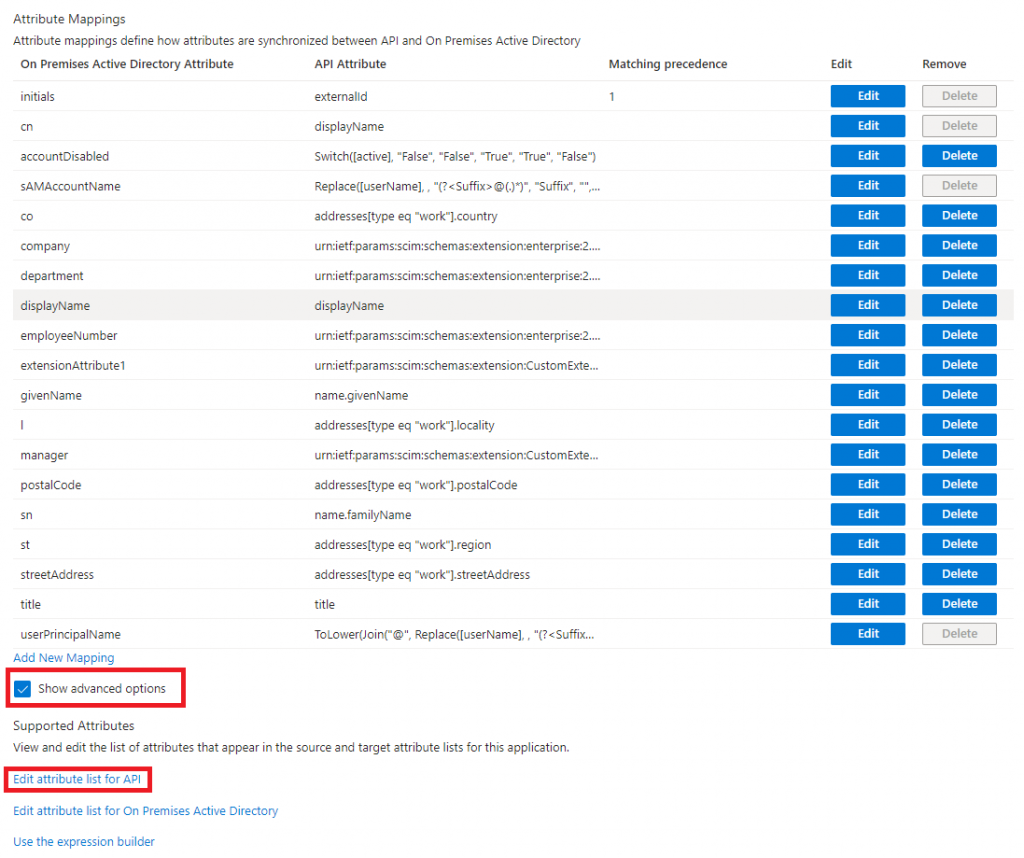
You will then see 3 new options:
Edit attribute list for API.
Edit attribute list for On Premises Active Directory.
Use the expression builder.
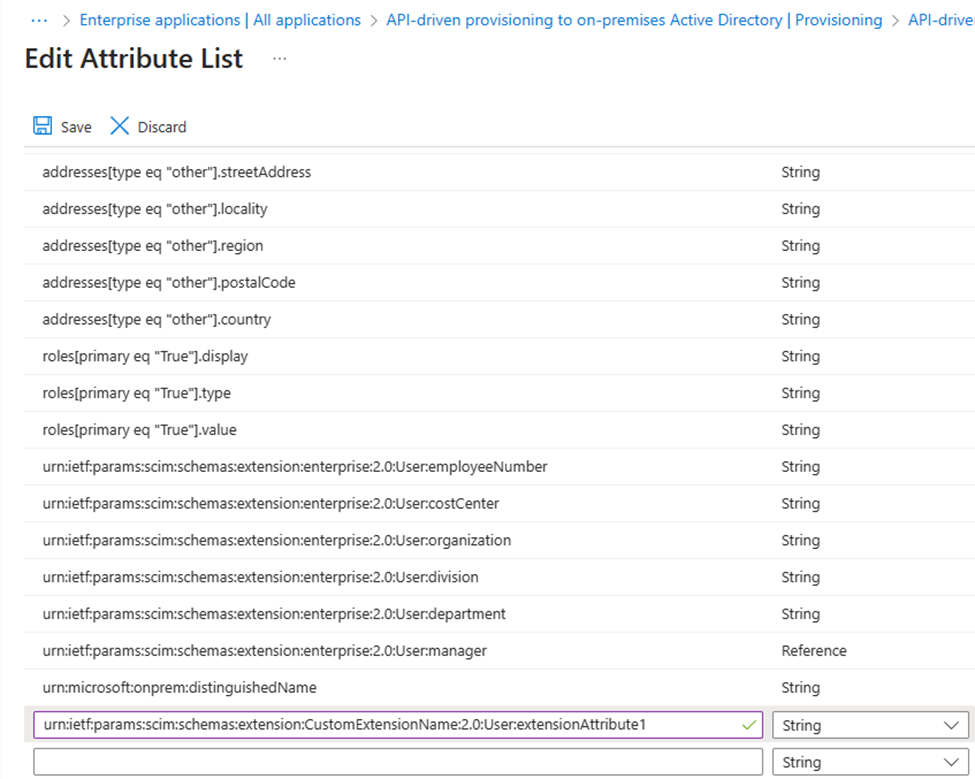
Click on Edit attribute list for API and the scroll down to bottom of the page, here you will see an empty line.
In that empty line we are going to paste in the following:
urn:ietf:params:scim:schemas:extension:CustomExtensionName:2.0:User:extensionAttribute1
This is a modified name of urn:ietf:params:scim:schemas:extension:enterprise:2.0:User:department where enterprise:2.0:User:department is replaced with CustomExtensionName:2.0:User:extensionAttribute1 instead. This to done so we can create our custom extensions in the SCIM schema in the JSON payload.
Start by pasting urn:ietf:params:scim:schemas:extension:CustomExtensionName:2.0:User:extensionAttribute1 into the empty line at the bottom of the list and in Type column select string and the select “Save” in top of the window. You will then be redirected back to the Attribute Mapping list.
Now select Add new mapping in the bottom of the Attribute Mapping list. You should be able to find urn:ietf:params:scim:schemas:extension:CustomExtensionName:2.0:User:extensionAttribute1 in the Source attribute dropdown menu, select it and then in Target attribute select extensionAttribute1.
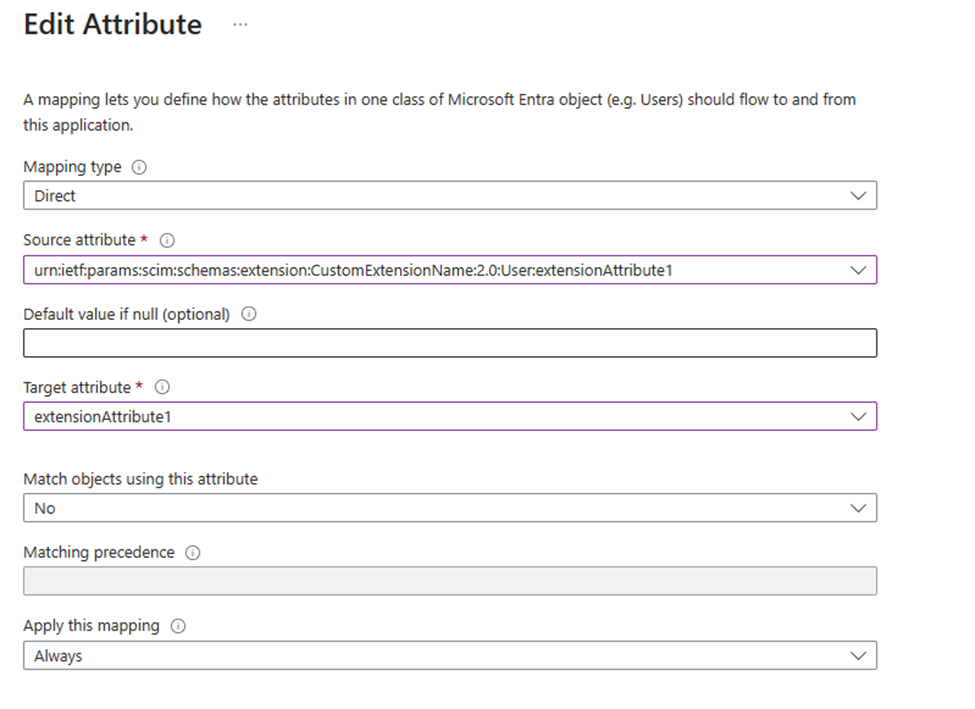
When you have done that, select Ok at the bottom of the window and save in top of the next window.
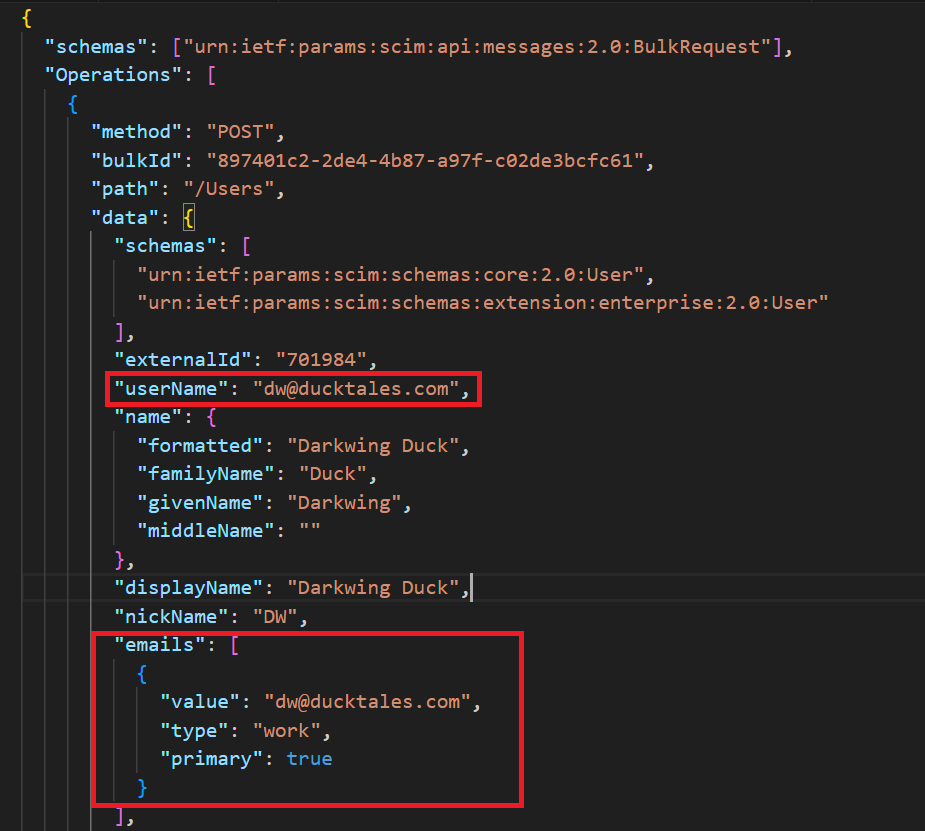
The new mapping is now saved, and we can now go to our JSON payload file to add the new mapping.
The entry we are adding is schema name and the last part of the schema name (source attribute) like this:
"urn:ietf:params:scim:schemas:extension:CustomExtensionName:2.0:User": {
"extensionAttribute1": "123 ABC"
}
This is added at the last part of the JSON payload right after the last entry in urn:ietf:params:scim:schemas:extension:enterprise:2.0:User (line 61 to 63)
This process can be repeated for any string attribute you want to map, like EmployeeType, WWWHomePage, msDS-cloudExtensionAttribute1, Division, etc.
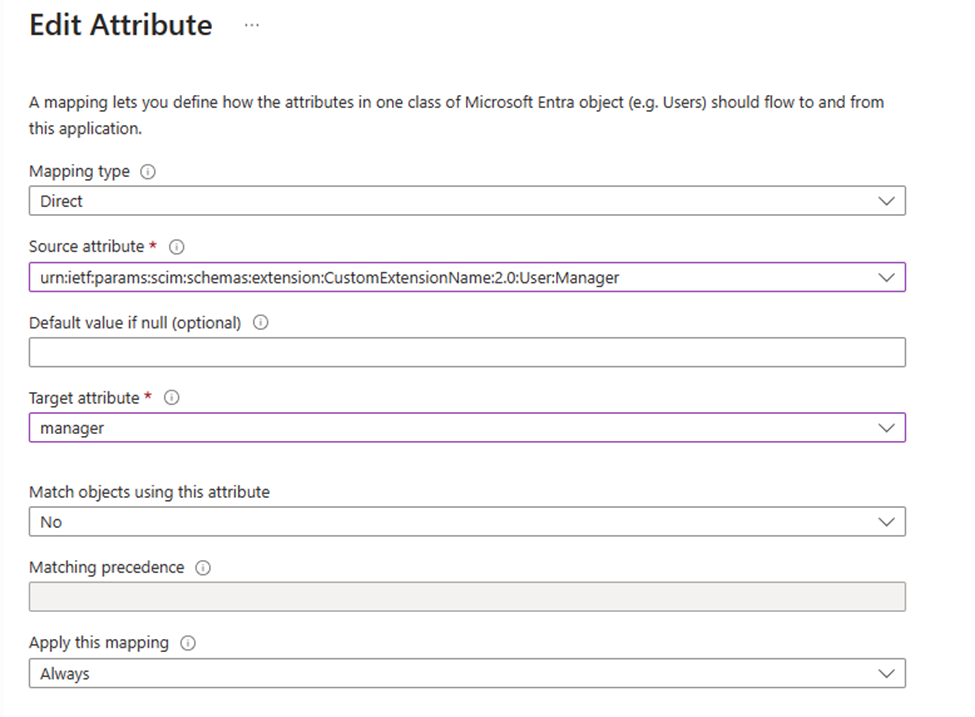
Mapping the Manager attribute.
The last one I want to share with you is the Manager attribute. This is a mapping that is there out-of-the-box. But I couldn’t get it to work because it was a reference in the attribute list for On Premises Active Directory. So, I ended up creating my own mapping like the one with extensionAttribute1. – You have to delete the original manager mapping in the mapping list for this to work.
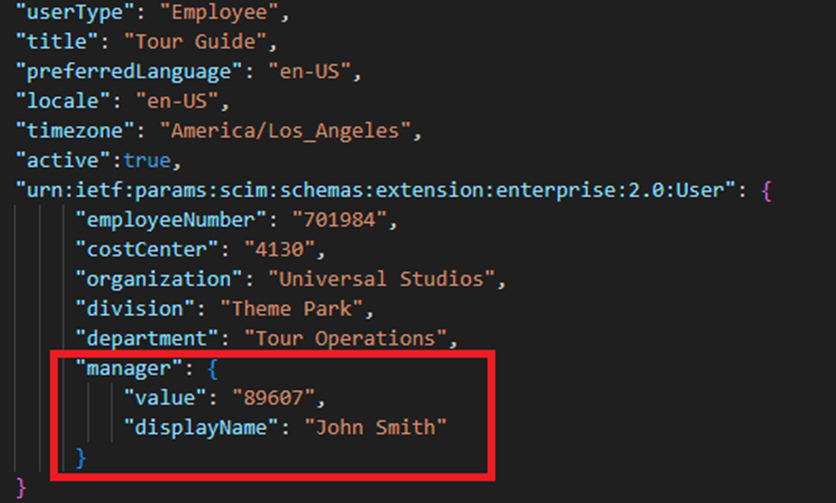
The screenshot is from this JSON: https://learn.microsoft.com/en-us/entra/identity/app-provisioning/inbound-provisioning-api-curl-tutorial#bulk-request-with-scim-enterprise-user-schema
To add the Manager attribute, I repeated the steps for adding extensionAttribute1. The value of the manager for this to work must be the Username of the manager.
The name of Source attribute will then be:
urn:ietf:params:scim:schemas:extension:CustomExtensionName:2.0:User:Manager
and the type is String. It’s worth noting that if the user is you want to have as manager for the user doesn’t exist in you Active Directory, the user will still create or updated, you will however see and error in the provisioning log saying that the attribute couldn’t be mapped.

Select Save in the top of the window and the select Add new mapping you should once again be able to select urn:ietf:params:scim:schemas:extension:CustomExtensionName:2.0:User:Manager
in the drop-down menu of Source attribute and then select Manager in the Target attribute.
(Remember you have to delete the original manager mapping in order for this to work)
The JSON payload file will then have to be modified to look like this (the same process with ExtensionAttribute1):
You should now be able to create your own mappings and modify existing ones after you have read these four sample cases. I can’t stress enough that you need to test away from your production environment.