
API-driven Inbound User Provisioning to On-Premises AD is a feature that I personally have been really excited about for quite some time. I started working with it when it was in public preview around June 2023 and it went to General Availability in early 2024.
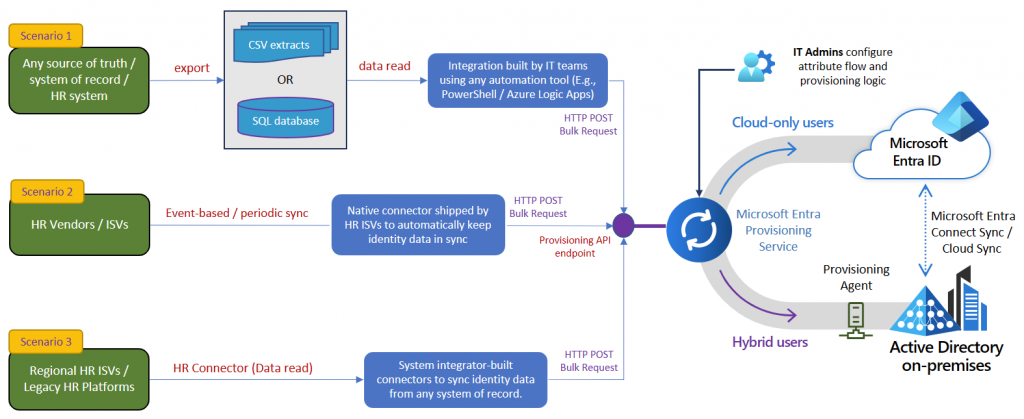
API-driven Inbound User Provisioning is streamlined way of managing users in your Active Directory. It requires you to have an agent installed in your environment to handle the provisioning, and a Microsoft Enterprise application that is sending the requests you provide to the agent, and then agent will then create, update or delete a user in your Active Directory. This is something many of us have either build ourselves from the ground up with PowerShell or something similar or using a 3rd party vendor. But now you have the opportunity to use a “native” Microsoft product from the cloud to handle users. You do how ever still need to do some configuration.
API-driven Inbound User Provisioning to On-Premises AD feature enables you to handle onboard, offboard and moving users in your environment using virtually any source of truth (HR system) as long as you can get the data out of the HR system in format you can work with. (It could be a .csv file or another format)
If you are working with identity and access management, then the API-driven inbound user provisioning is just the thing for you to take a look at.
In this blog post I’m going show you how to set up API-driven Inbound User Provisioning to On-Premises AD and provision a user using PowerShell.
This blog post is divided into the following chapters:
- Setting up the Enterprise app and its permissions.
- Installing the Provisioning Agent.
- Provision a user using the above with PowerShell.
The Enterprise app and its permissions.
The first step in the setup is to configure the Enterprise Application in Microsoft Entra.
Start by going to the Microsoft Entra Portal (or Azure AD portal) – https://entra.microsoft.com/#view/Microsoft_AAD_IAM/StartboardApplicationsMenuBlade/~/AppAppsPreview and make sure you have the following permissions:
Application Administrator and Hybrid Identity Administrator.
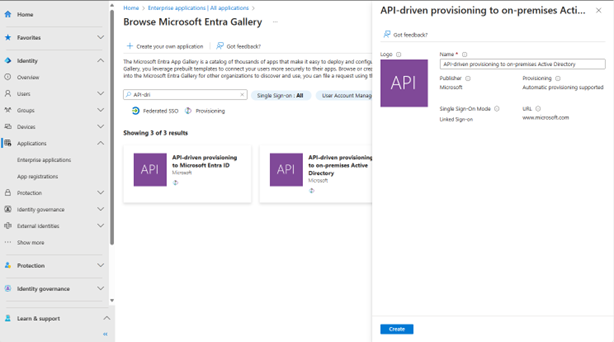
Select “New application” in the top of the window, and then in the search box search for “API-dri” should be enough (else use: API-driven provisioning to on-premises Active Directory).
Select the one called “API-driven provisioning to on-premises Active Directory” and click “Create” and wait a few minutes. The page will then change to the Enterprise app we just created.
Before we configure the provision in our newly created Enterprise App, we need some permissions to make it work first. What I did was that I assigned the following Microsoft Graph Application permissions to the App registration that was created a long with the Enterprise application.
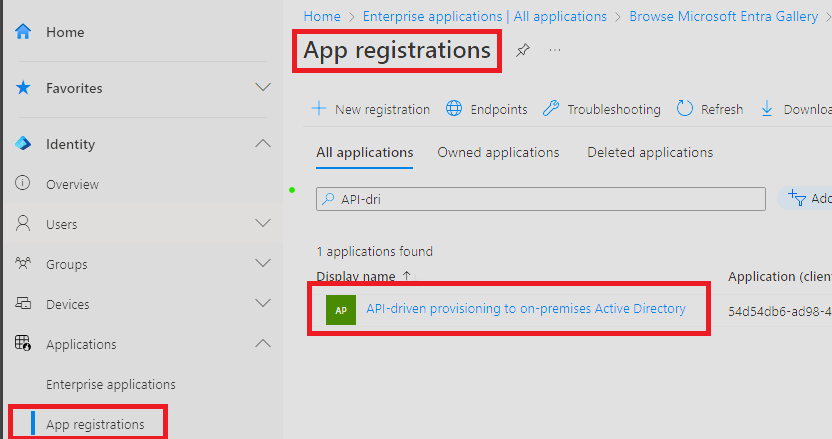
The permissions we need to assign to the App registration is the following1:
- AuditLog.Read.All
- SynchronizationData-User.Upload

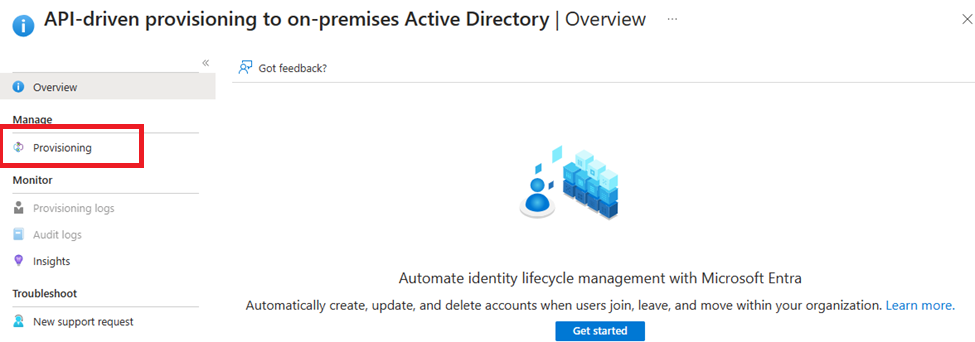
Next step now is to configure the provisioning service in the Enterprise application. Navigate back to Enterprise application and select the Enterprise application named API-driven provisioning to on-premises Active Directory.
Now select “Provisioning” and select “Provisioning” again the left side of the menu. (Yes, twice).
Start by changing the provisioning mode to “Automatic” – Don’t worry, nothing will happen.
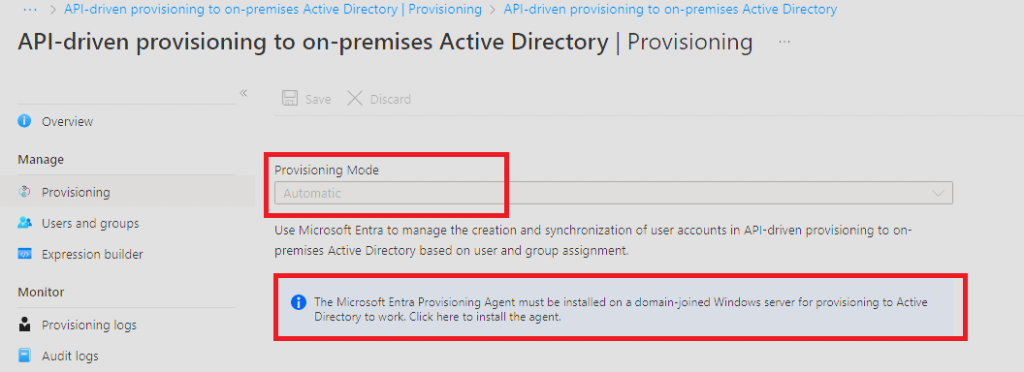
The next step is to install “The Microsoft Entra Provisioning Agent”. This agent needs to be installed on a Windows server with line-of-sight to your domain controller(s). You should not install this on a Domain controller, or your AD Connect server. The AD connect client and provisioning agent can coexist in the same domain and tenant without impact to one another.
In my production environment I chose to install it on a new Windows server 2022 VM in Azure for the solo purpose of using that same VM as a Hybrid worker with an automation account and to function as sort of identity and access management mid-tier server.
I my mind, this was the best and cleanest way to start using the API-driven inbound provisioning in conjunction with Microsoft Entra ID governance at a later stage.
Start by downloading the agent by clicking the “information” box and then selecting Accept terms & download (After you read the Terms of Service of cause)
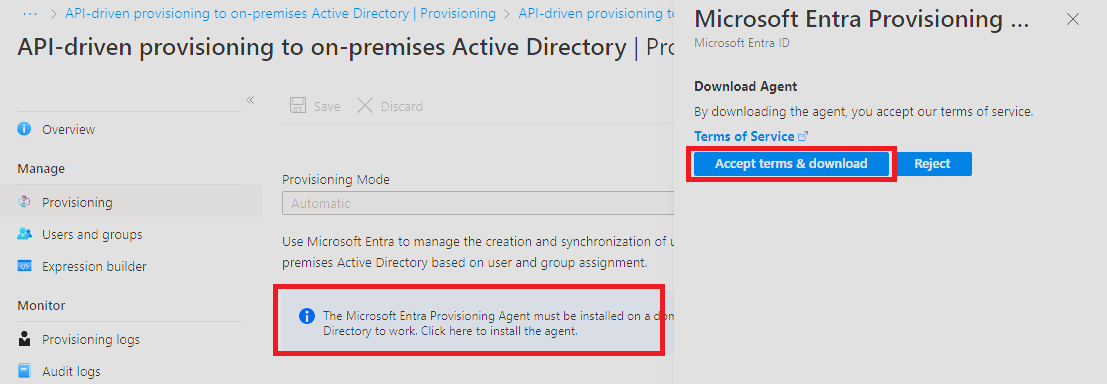
The name of the file should be AADConnectProvisioningAgent.Installer.msi” copy (or move) that file to the server you have chosen to host the agent.
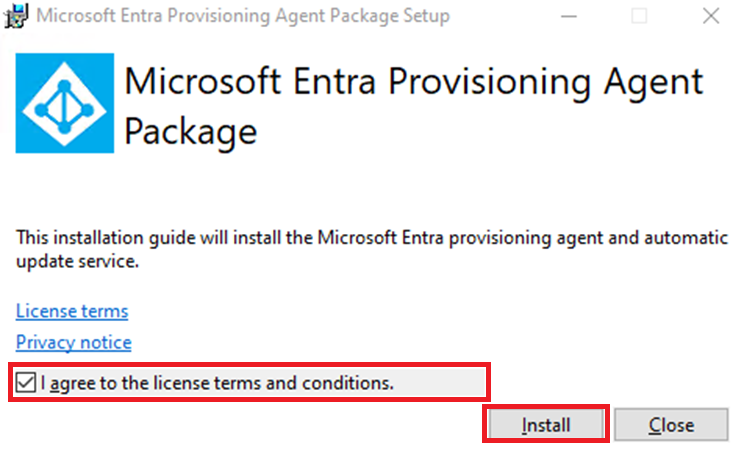
Installing the provisioning agent
Start the installation the way you normally would do it with an .msi file. And then firstly click “agree” to the license terms conditions (after you read them) and then press Install.
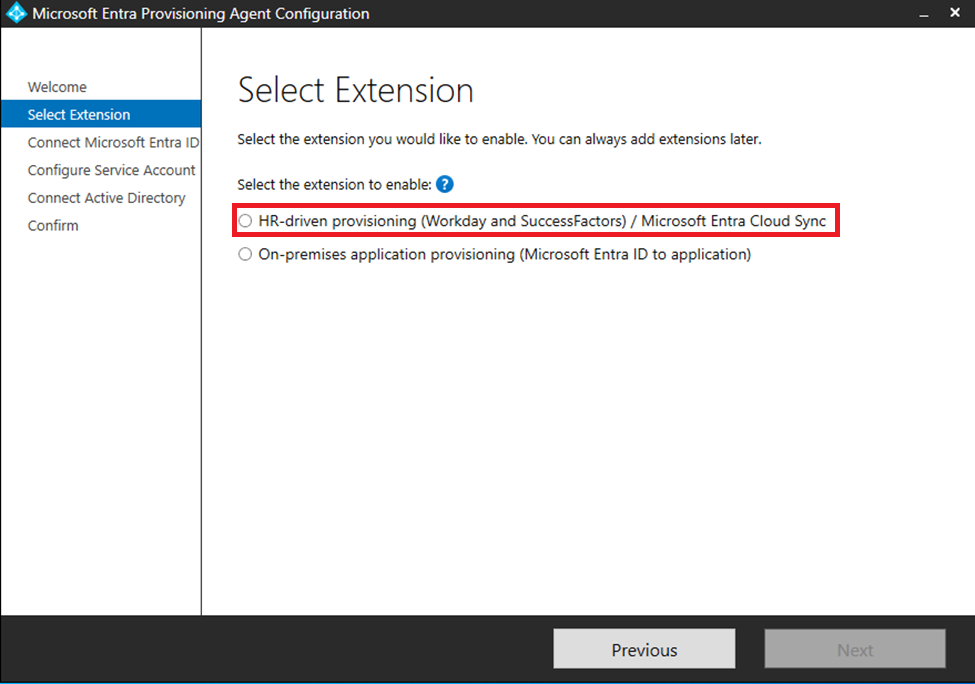
When the installation is done, you will be presented with the first window in the configuration, simple press Next:

We will then select HR-Driven provisioning and press Next.
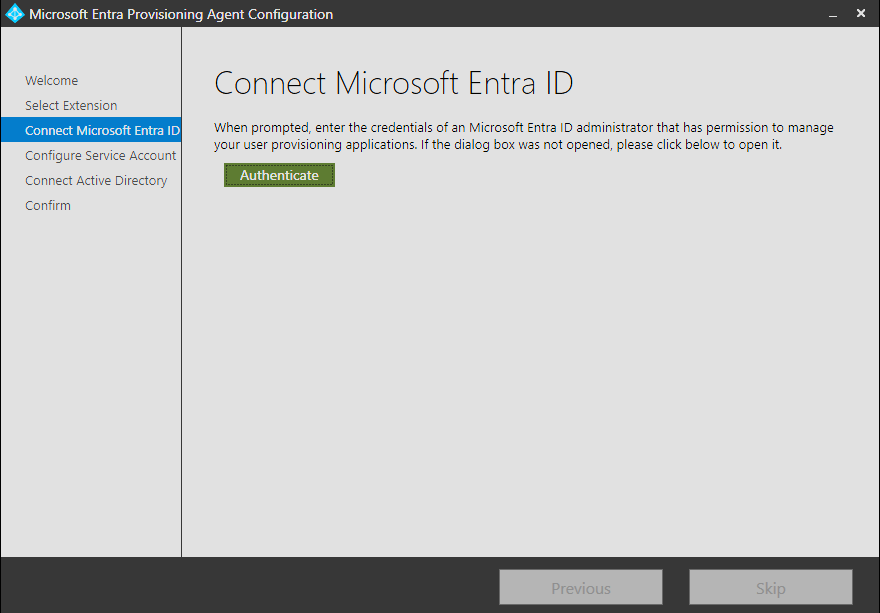
You will now be asked to Authenticate to Microsoft Entra ID – The account you are using should have one of the following Microsoft Entra ID rolles: Global Administrator or Hybrid Identity Administrator
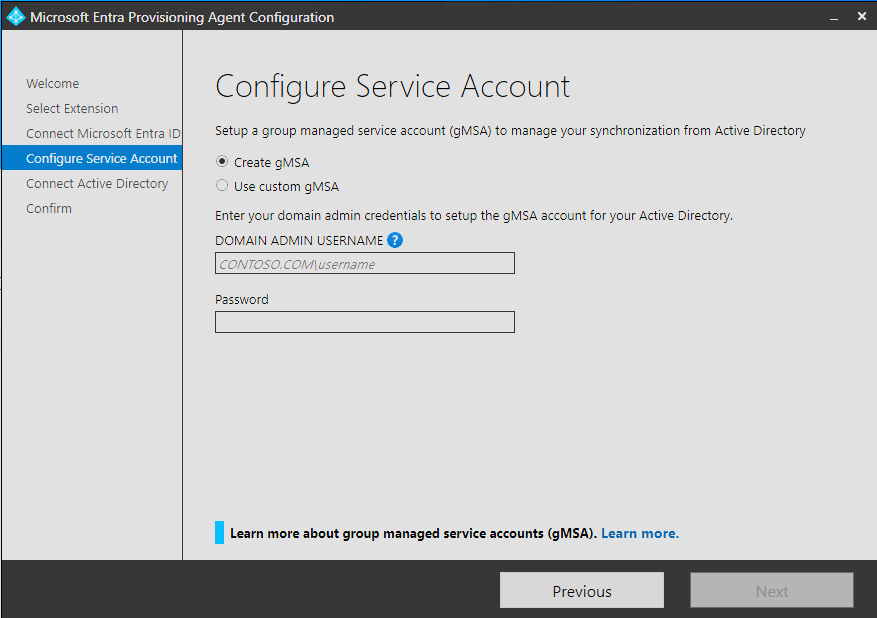
You now need to create a gMSA account – This is fairly simple (you should not use an existing one)
Select Create gMSA and type in credentials that has domain admin rights to create the gMSA account and press next.
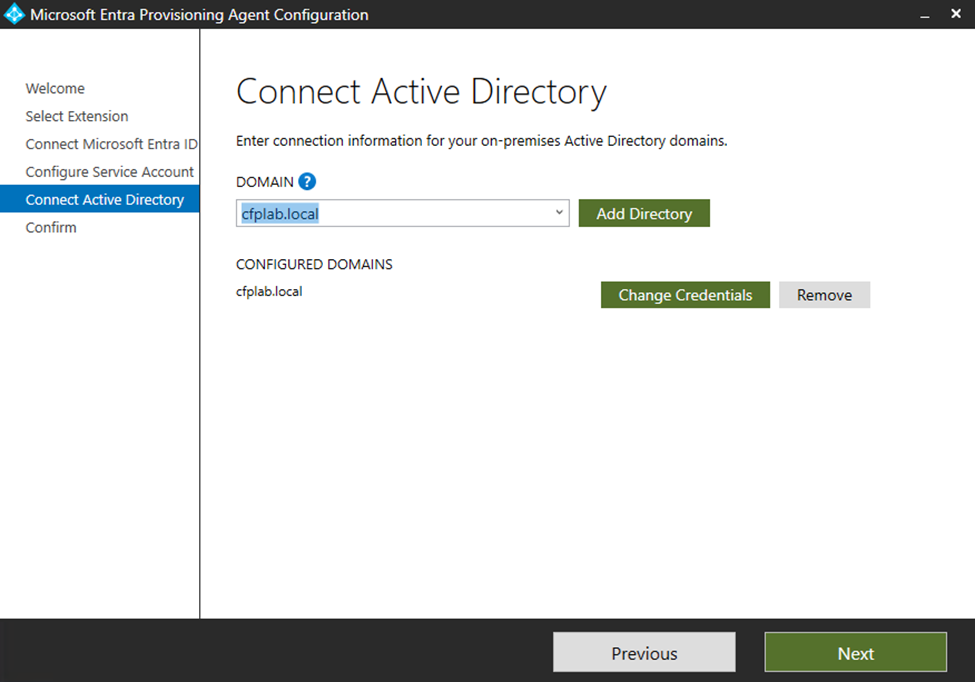
The information you have provided will then be validated and you will be presented with a new window that shows your domain name (The one you type with your domain admin account name) – Press next and you will then see a confirmation windows with the information you have provided. Press confirms.
The gMSA account will now be created and the provisioning agent will now be linked to the Enterprise application we set up earlier. Note that this process can take up to 2 minutes to complete.
You will be presented with this dialog when the configuration is completed:

After you see this, press “Exit” and then “Close” in the next dialog window. – The setup and configuration of the Provisioning agent is now complete, and we can then go back to our Enterprise application – API-driven provisioning to on-premises Active Directory
Finishing the setup of the Enterprise application
We left off in the setup of the Enterprise Application API-driven provisioning to on-premises Active Directory app where we selected “Automatic” and then installed the agent. We now need to select our domain and a Default of OU for new yours.
You should be able to select your domain in the drop-down menu (You may need to close the browser and start again to get your domain to appear).
You need to add the distinguishedName the of the OU where new users will be created to (Provisioned to).
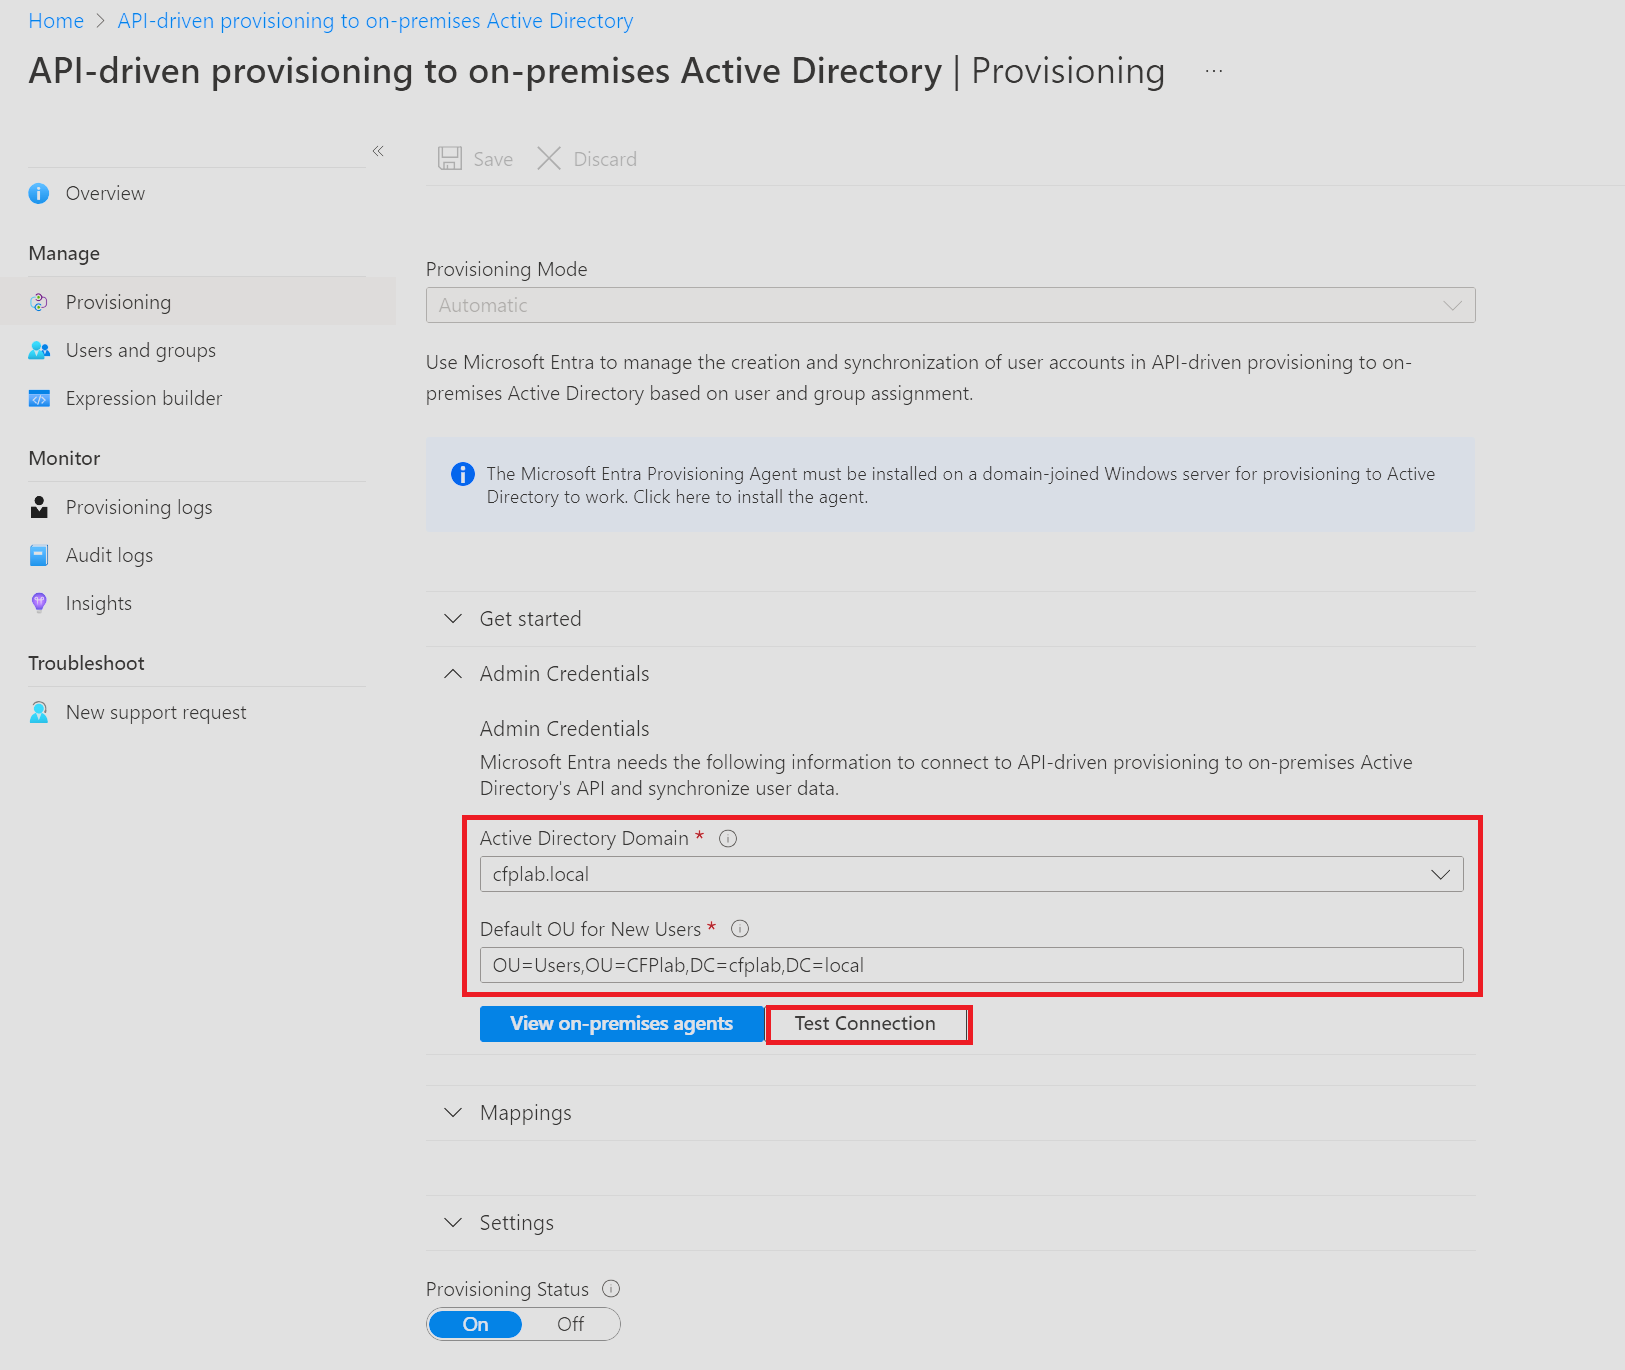
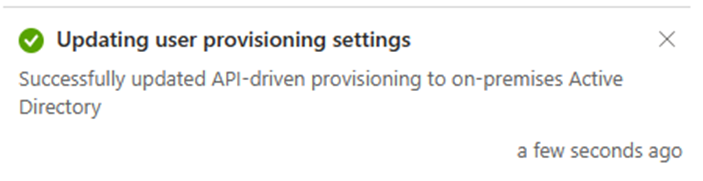
When you have completed this. Press Test connection to make sure it’s working and then hit “Save” in the top of the window – Don’t worry, the system will not start to manage users, or anything related to your Active If everything went well you should this notification:
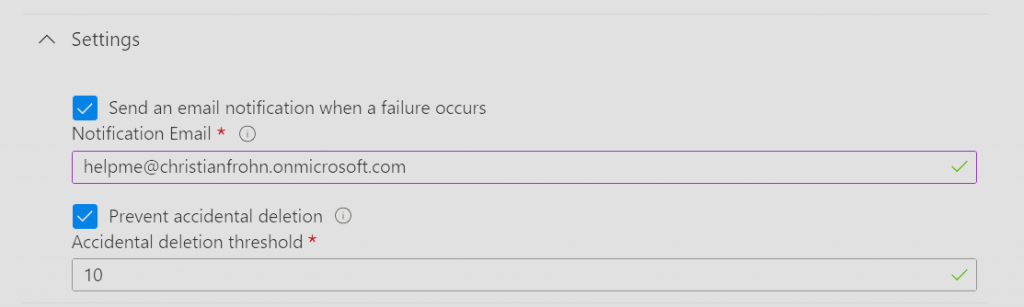
The next step is to provide and email address where notifications will be sent in case of errors and threshold number for how many users that can be deleted in one sync cycle before the system stops automatically – This is a nice feature to protect yourself from deletion of all users. When you have filled those out. Hit save on the top of the window again.
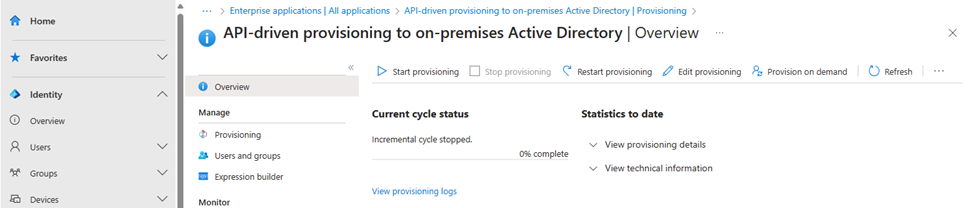
The last step is to “Start” the provisioning service – Again, nothing happens, this just mean that provisioning request sent to the service will be processed:
We have now completed the setup of the API-driven provisioning to on-premises Active Directory.
Provision a user using the API-driving user provisioning with PowerShell.
Note: The PowerShell scripts and samples in this blog post is provided “AS-IS” and you are responsible for any liability in your environments.
Microsoft did at the end of October 2023 provide PowerShell samples – I did however find them to complex for my use case and I wanted to be more in control of my code. So, the following you are about to see and read is more simple way (in my opinion) of using the API with PowerShell.
When the API-driven provisioning to on-premises Active came into public preview the summer of 2023, there was only cURL code samples on how to use it, and unfortunately for me I’m not proficient in cURL.
But I was in luck – I had access to the GitHub Copilot, so I asked it to convert the following two code lines of cURL code from the MS docs into PowerShell. I’m most more confident in using PowerShell. 🙂
The following is the cURL code that i copy from the Microsoft docs, and then asked GitHub Copilot
The prompt in GitHub copilot: “Convert the selected code into PowerShell”
cURL:
PowerShell
The first part of the code is the authentication to Microsoft Graph to get an access token. This is done by using the app registration from earlier were assigned permissions. We now need to create a secret to be used for auth.
The second part of the code is where we send the JSON payload to the Inbound Provisioning API Endpoint.
Remember, the PowerShell code above is just to illustrate how i converted cURL code to PowerShell with GitHub Copilot to be able to have a simpler way of using the API-driving provisioning using PowerShell and not the Microsoft supplied samples.
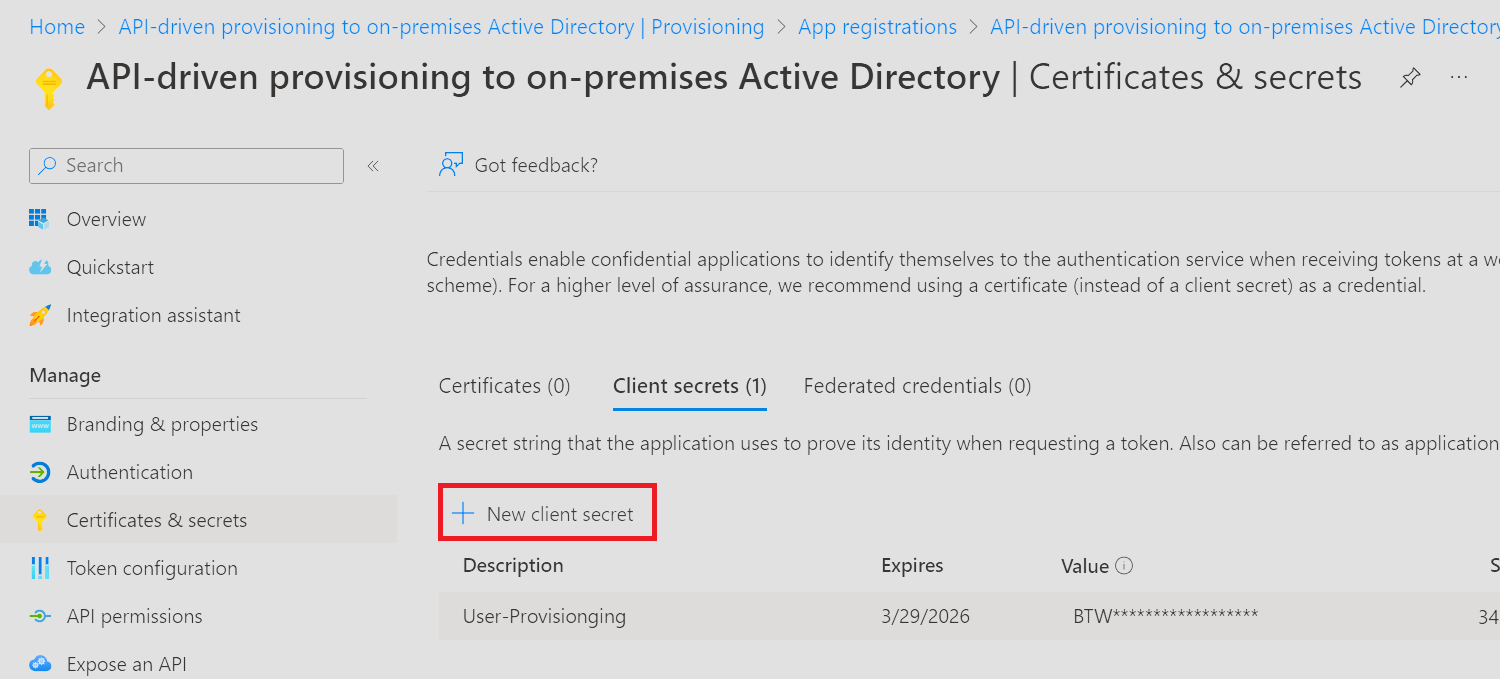
Start by navigating to your app registration and then create a secret and copy it to a safe location – Once you navigate away from the page, you won’t be able to copy the secret value again.
This is the cleaned-up version of the PowerShell code we need to use is this:
(Remember that credentials should NEVER be used in clear text in your code)
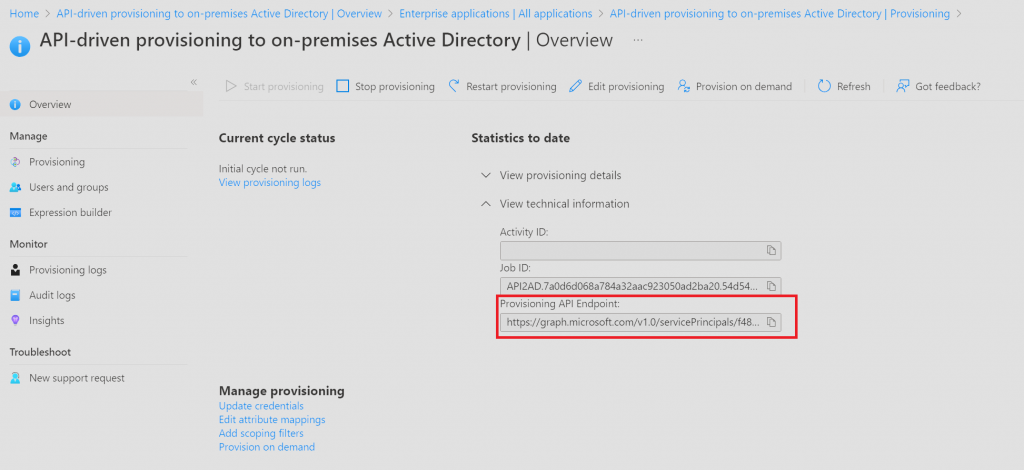
After you have providede ClientID, Secret and TenantID, you need to find the Provisioning API Endpoint. This is found on the provisioning configuration page here:
Note that there is JSON element in code which brings us to where the “payload” is sent to the provisioning services in the Enterprise application we setup earlier.
The JSON payload is built around SCIM – What Is SCIM? Meaning and Integration | Microsoft Security
This JSON payload is a basic one that I have created with inspiration from the Microsoft docs. I will in another blog post go more into details on how to customize the JSON file, so you are able to pick and choose the Active Directory attributes you want to populate when you are provisioning users.
The most important part of the JSON file is the ExternalID attribute – This is used to “find” the user in your directory – If the provision services can’t find the user, the user will be created, otherwise it will update the user with the values providede to the Active Directory attributes that are defined in the JSON.
By combining the JSON payload and PowerShell code into one single file – The code looks like this:
After the code has been run, you can go to the Enterprise app and select provisioning, and then select View provisioning logs. By selecting one of the entries on the list, you can see what has been updated on the user or what attributes that has been filed out when the user was created.
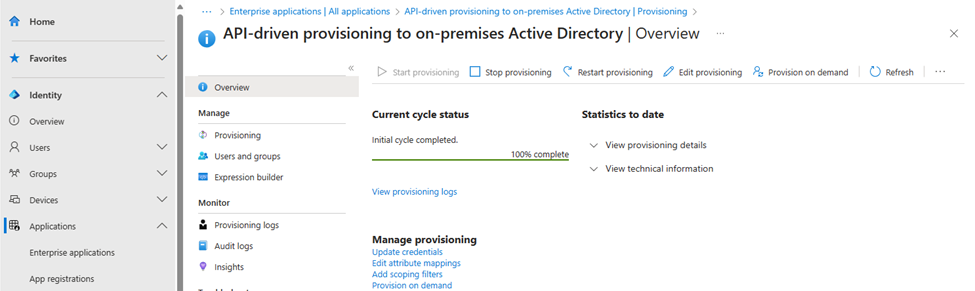

You have now completed the setup of the API-driven Inbound User Provisioning to on-premises and created a new user in Active Directory.
- Microsoft writes in the official documentation that you should create a new Service Principal or a managed identity – https://learn.microsoft.com/en-us/entra/identity/app-provisioning/inbound-provisioning-api-grant-access#configure-a-service-principal ↩︎